In some cases out of high labor costs or the need to improve container and trailer loading efficiency, before being loaded into container, cartons should be first loaded onto pallets. Under such circumstances users need to calculate both how to load cargo onto pallets and then how to load palletized cargoes into containers or trailers.
It’s both hard and complicated for human minds to calculate an optimal loading solution. Is that possible to easily integrate these two stages together in one load plan?
The answer is a definite yes!
How to realize this in LoadMaster cargo loading optimization software? Let’s check it out with an exact example.
Cargo data:
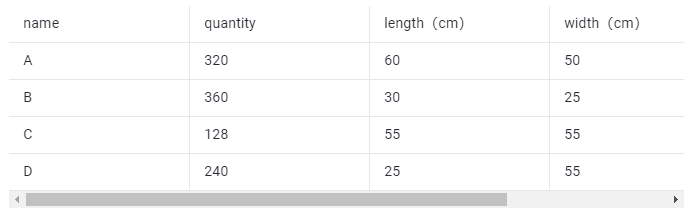 Cargo data chart.
Loading requirements:
- The cargo cannot be placed with the length vertical to the ground.
- Plan how to pack cargo on pallets, what sizes of pallet and container are the most efficient to use, and how many pallets and containers are needed for the container and trailer loading solution.
- The height limit of the cargo that can be stacked on pallets is 1.1 meters (including the height of the pallet itself).
According to the current cargo loading requirements, the task type [2-Steps Loading] should be selected.
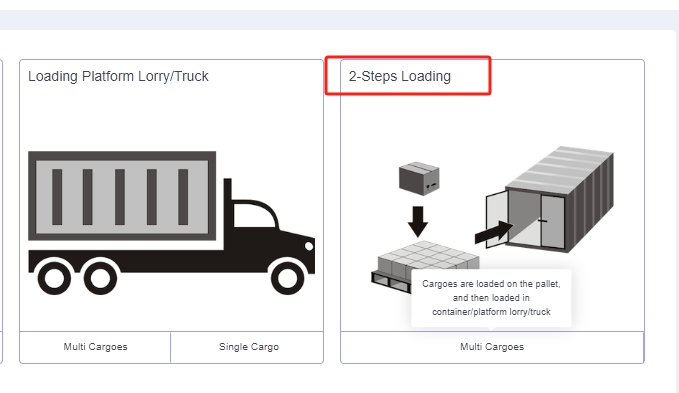 This is two-steps loading task type.
Fill in the basic information including the loading task name.
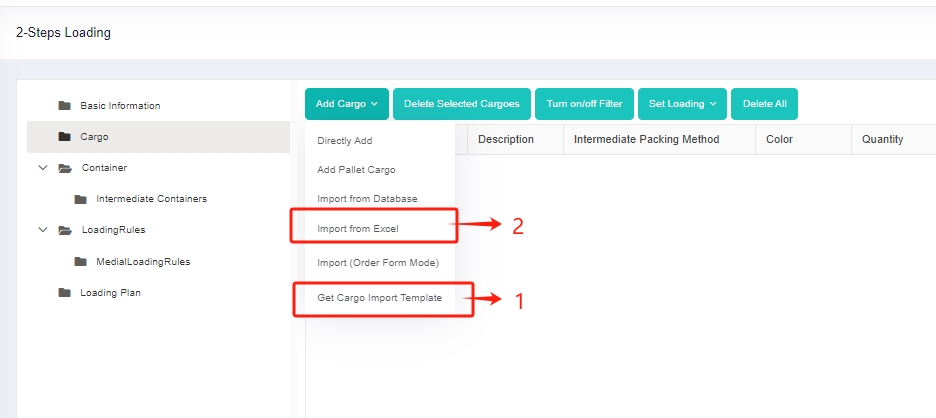
Step 1: Click [Cargo] on the left to enter the cargo interface. For there are lots of cargo types, you should add them in batches through [Add Cargo>Import From Excel]. Firstly, click [Add Cargo>Get Excel Template] to download the Excel template and save it to a certain location in your computer.
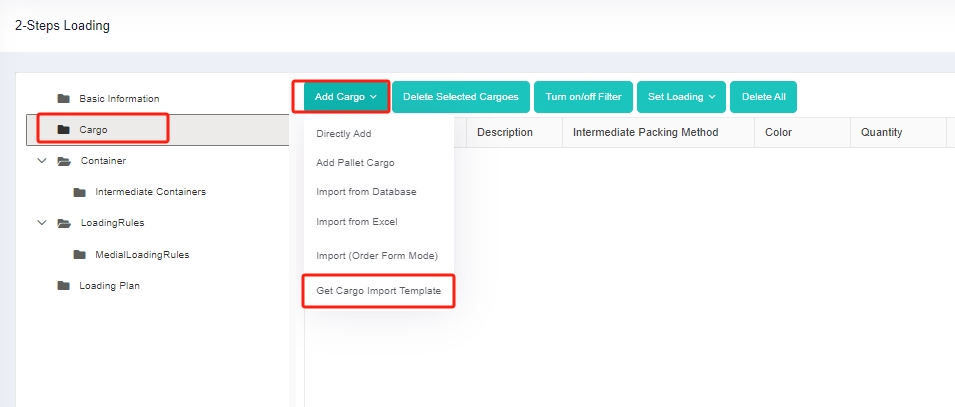 This is to add cargo through excel template.
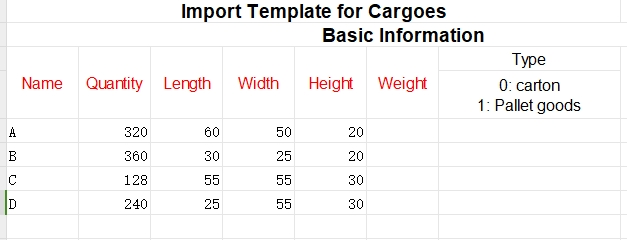
Secondly, fill in the template with the cargo information.
①Copy the name, quantity, length, width, height, and weight (gross weight of a single box) of the goods into the template, which are required items. Pay attention to the matching of the units. “Weight” refers to the gross weight of a single carton or box of goods.
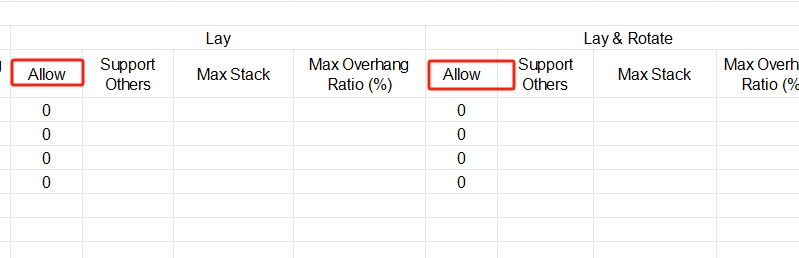
②Then define the placement orientations of the cargo. For it is required that cargoes cannot be placed with the length vertical to the ground, that is “lay” and “lay & rotate” are not allowed, you should fill in “0” under the “allowed” Column of “lay” and “lay & rotate” orientations. “0” means not allowed such load orientation, leave it blank or “1” means allowed.
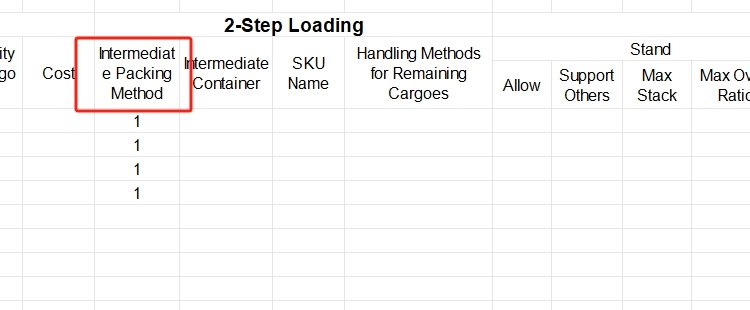
③Define the properties for loading. For the cargoes are required to be palletized first and then loaded into the container, the “Intermediate Packing Method” of the goods is set to “1”. “0” or blank means that the goods are directly loaded into the container; “1” means that the software would choose the most efficient pallet type for the cargoes out of frequently used pallet types. “2” means that the goods are loaded with the specified intermediate packaging.
For there are no other requirements, you do not need to set other parameters, leaving them as the default value. Save and close the template when finishing.
Thirdly, return to the [Cargo] interface, click [Add Cargo>Import From Excel], choose the template you have just finished, and open it. Then the cargo information will be imported to the software very quickly.
Step 2: Click [Container] on the left to enter the [Container] interface. For the user does not know the most efficient type and quantity of container that should be used, it is necessary to add all the frequently used container types so that the system can select the most appropriate ones.
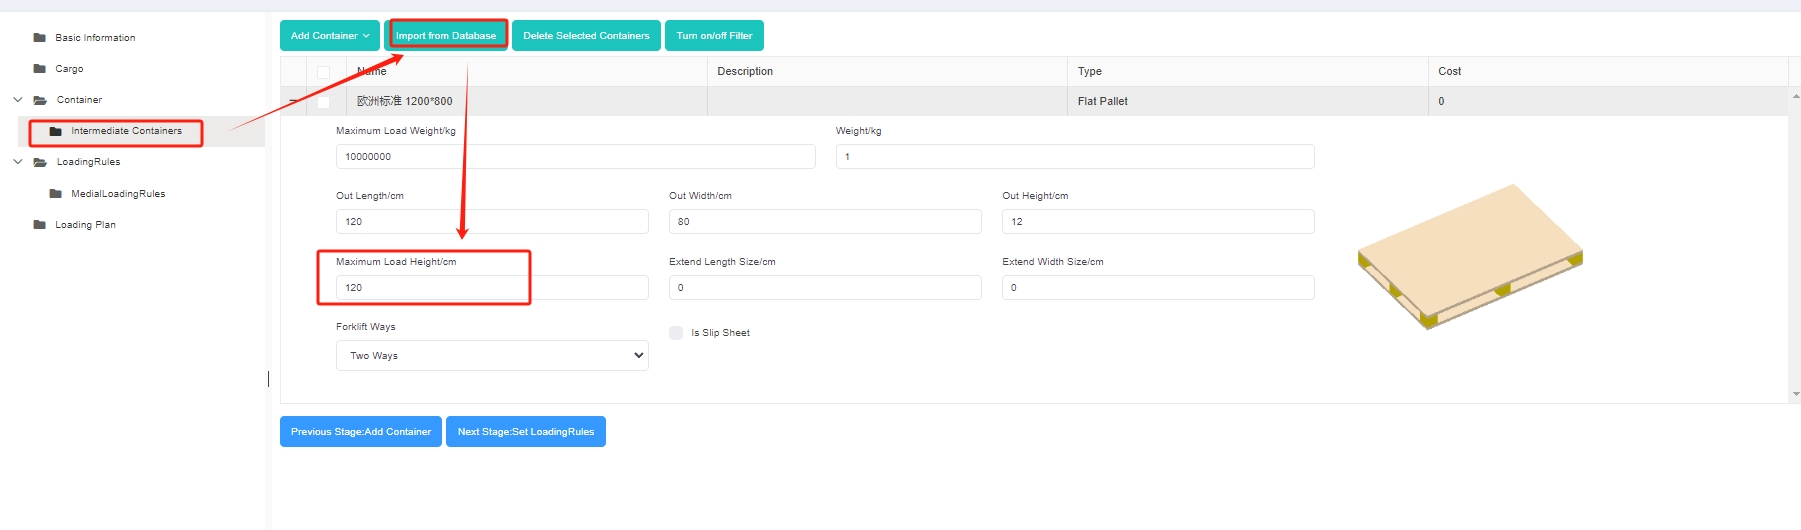
Step 3: Click [Intermediate Container] on the left to add a pallet. For the user does not know the most efficient type and quantity of pallet that should be used, it is necessary to add all the frequently used pallet types so that the system can automatically and intelligently select the most appropriate one. If there is no commonly used pallet in the database, you can click the [flat pallet] under [Add Container], and then edit the name, length, width, height and other information.
For this case, you can click [Import from Database], and then check the frequently used European and Asian standard pallets in the pop-up box and click [Add]. Set the [maximum load height] of the pallet to “110CM”.
Step 4: Click [Loading Rules] on the left to enter the [Loading Rules] page. For there is no special loading demands, keep the loading rules for both containers and intermediate containers as default.
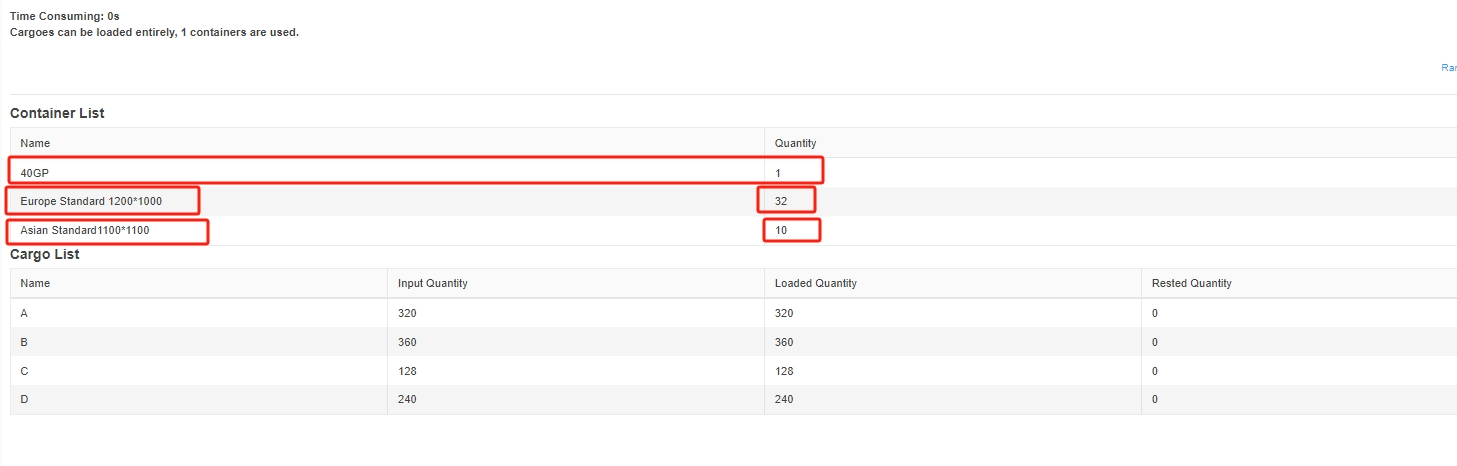
Finally, click [Loading Result] above or click [Loading Plan] on the left to calculate the load plan. Then you can get an optimal loading solution within seconds. According to the container list on the left, it can be counted that this batch of goods uses 32 pallets whose size is 12001000 and 10 pallets whose size is 11001100, and finally use one 40GP. You can click on the container name to see the 3D loading diagram of each container. On the right side of the diagram are the cargo statistics, loading steps and balance analysis of the current container.
You can share the load plan to mobile phones to guide the on-site loading and download the loading report to make the packing list to prepare for the customs declaration.
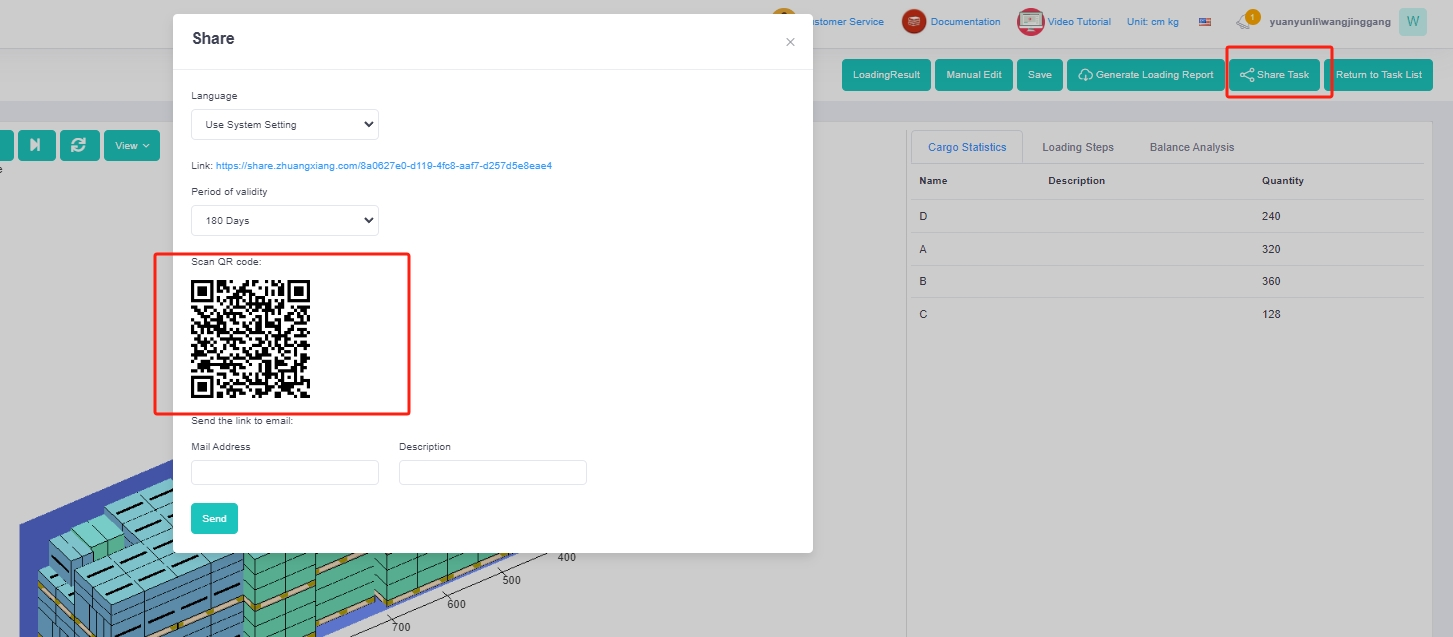
You can share the load plan to mobile phones to guide the on-site loading and download the loading report to make the packing list to prepare for the customs declaration.