When cargoes are first palletized and then loaded into the container, some users want all the goods to be palletized; others hope that the remaining space of the container can be filled with bulk cargo, or the last several pieces of cargo can be loaded into the container directly without being palletized.
How to realize it in LoadMaster container and truck loading software?
Here is an example to explain:
Cargo data:

Loading requirements:
- Cargo can only be placed with the height vertical to the ground.
- Calculate how to palletize cargo first onto pallets and then load them into containers, what kind of container are the most cost-effective and how many are needed. The maximum height of a piece of palletized cargo is 1.2 meters.(Pallet height is also included.)
- If there are several pieces of cargo left, load them in bulk into the container directly without using pallets.
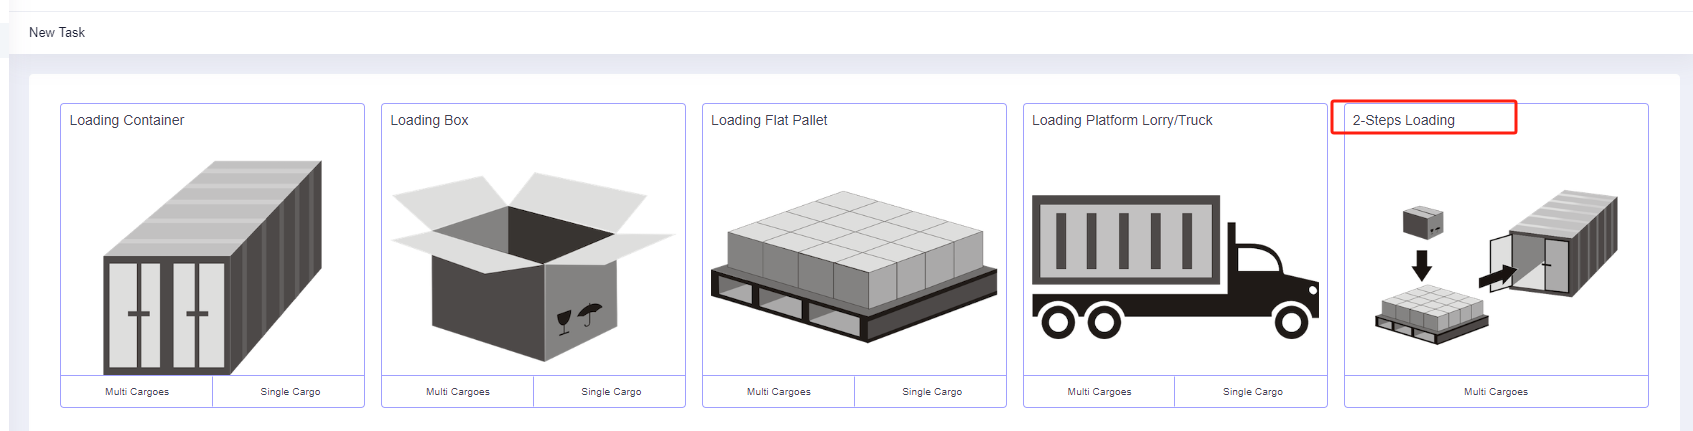
According to the current loading requirements, the task type [2-Steps Loading] should be selected.
Enter the [Basic Information] interface. Fill in it with the PO number, order number or destination information according to actual work requirements for later check.
Next, configure the loading plan:
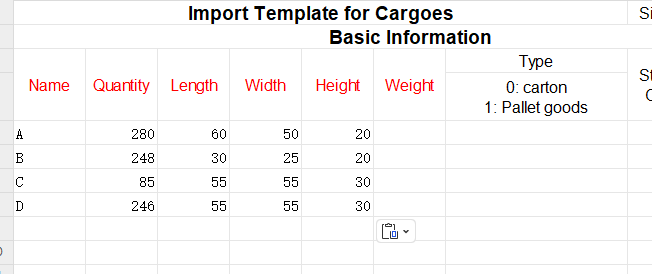
Step 1: Click [Cargo] on the left to enter the cargo interface. For there are lots of cargo types, you should add them in batches by [Add Cargo>Import From Excel]. Firstly, click [Add Cargo>Get Excel Template] to download the Excel cargo template and save it to a certain location in your computer.
Secondly, fill in the template with the cargo information.
①Copy the name, quantity, length, width, height, and weight (gross weight of a single box/carton) of the cargo into the template, which are required items. Pay attention to the matching of the units.
②Then define the placement orientations of the cargo. For it is required that cargoes can only be placed as the height is vertical to the ground, that is only “stand” and “stand & rotate” are allowed, you should fill in “0” under the “allowed” Column of other orientations. “0” means not allowed such load orientation, leave it blank or “1” means allowed.

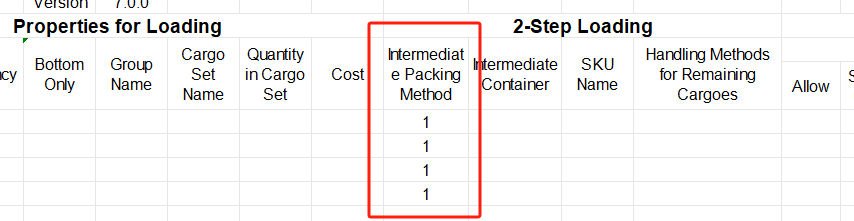
③Define the properties for loading. For the goods are required to be palletized first and then loaded into the container, the “Intermediate Packing Method” of the goods should be set as “1”. “0” or blank means that the goods are directly loaded into the container; “1” means that the goods are free to choose the appropriate pallet/carton; “2” means that the goods are loaded with the designated intermediate packaging.
For there are no other requirements, you do not need to set other parameters, leaving them as the default value. Save and close the template when finishing.
Thirdly, return to the [Cargo] page, click [Add Cargo>Import From Excel], choose the template in the dialog box, and open it. Then the cargo information will be imported to LoadMaster 3D container calculator.
Step 2: Click [Container] on the left to enter the [Container] interface. Add all the frequently used container types so that the system can select the most appropriate container from these options. (In this case, add 40GP, 40HC and 20 GP). Set the corner casting size and reserved size in the container.
Since forklift is needed for this case to lift pallets, the height reserved size should be set to 10cm in order to facilitate forklift operations; therefore, the 10cm of container corner castings are also deducted, therefore the size of corner castings does not need to be set.
Step 3: Click [Intermediate Container] on the left to add a pallet. For the user does not know the pallet type and quantity that should be used, it is necessary to add all the frequently used pallet types. In this case, you can click [Import from Database], and then check the frequently used European and Asian standard pallets in the pop-up box and click [Add]. Set the [maximum load height] of the pallet to “120CM”.
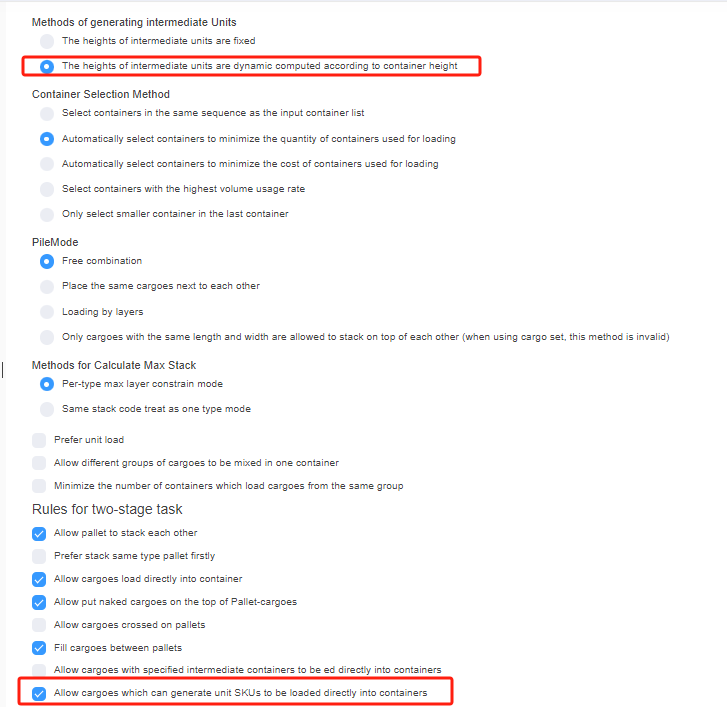
Step 4: Click [Loading Rules] on the left to enter the [Loading Rules] page. For the user requires the left several pieces of cargo can be loaded into the container in bulk without being palletized. Therefore, select [Methods of generating intermediate Units] as [The heights of intermediate units are dynamic computed according to container height]. And check [Allow cargoes which can generate unit SKUs to be loaded directly into containers].
Step 5: Click [Intermediate Loading Rules] on the left to define the loading rules when the goods are palletized. For there is no special loading demands, you don’t need to change the default rules in this page.
Finally, click [Loading Result] above or click [Loading Plan] on the left to calculate.
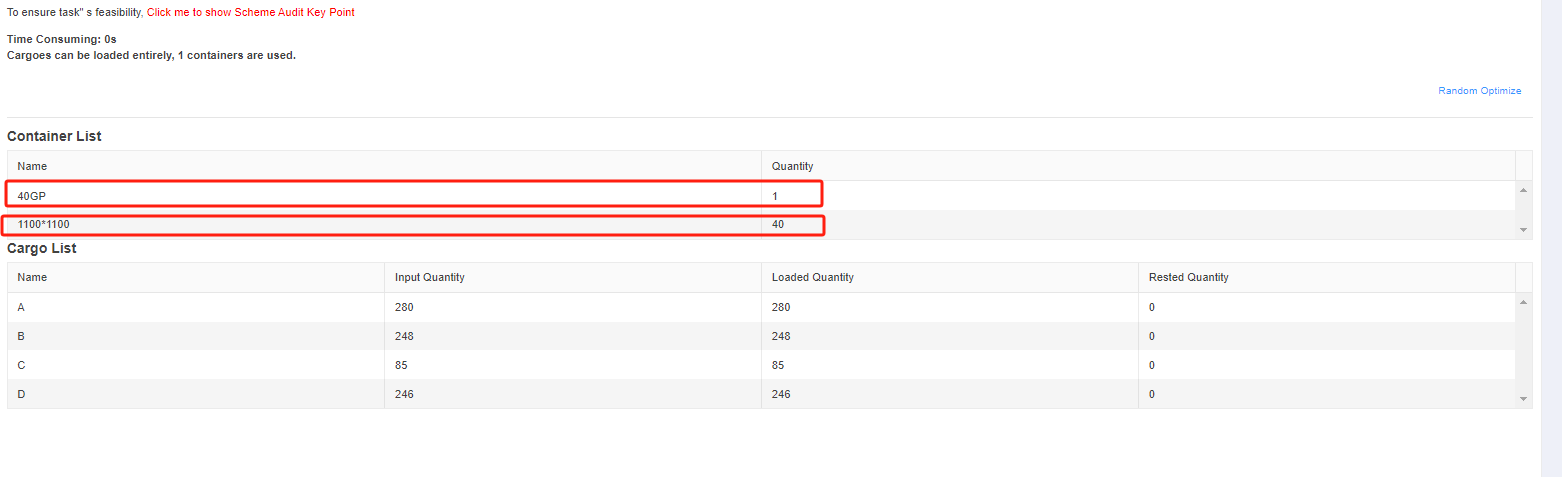
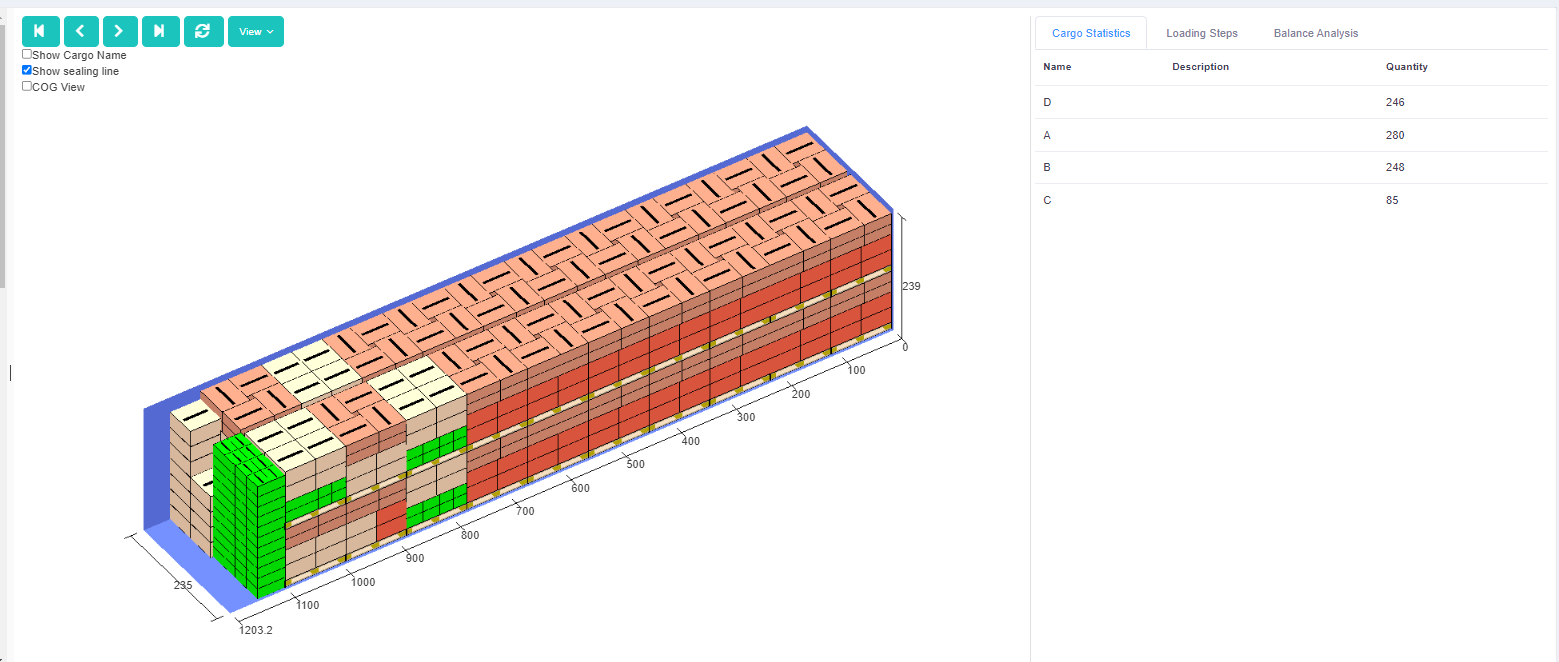
We can see that the container and truck loading plan is completed within seconds. In the container list on the left, we can see that this batch of goods used 40 pallets which is 1100*1100, and finally one 40GP. From the 3D loading solution diagram, there are several pieces of cargo loaded directly into the container because if all the goods are palletized, one container is not enough. So in this case, several pieces of cargo are loaded in bulk to save one container’s costs.
You can also use your mobile phone to guide the on-site loading and download the loading report to make the packing list in preparation for the customs declaration.