When multiple specifications of products are loaded into shipping containers (or vehicles or pallets), as long as the predetermined loading rate can be achieved, then out of the consideration for the convenience of tallying products, it is generally hoped that the same goods can be packed in one container as much as possible.
How to define it in LoadMaster container and truck loading software?
Let’s check it out with an example.
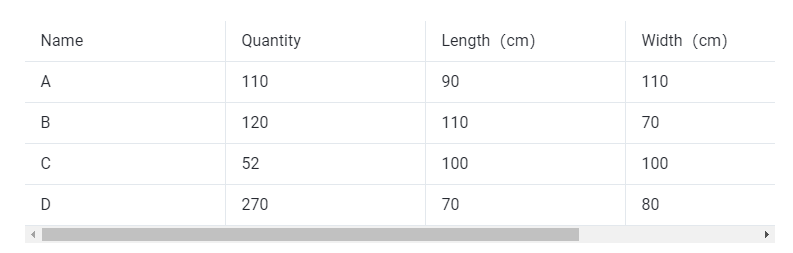
Cargo data:
Loading requirements:
1.Cargo A can be placed at will, and cargo B, C, D can only be placed with the height vertical to the ground.
2.When goods are loaded into containers, unitload container should be generated first, and the remaining goods can be mixed to be loaded in a container when loading.
3.Calculate how many 40GP are used to load all these cargoes.
According to the container loading requirements, the task type [Loading Container/Multiple Cargoes] should be selected.
Enter the [Basic Information] interface. You can fill in it with the PO number, order number or destination information according to on-site loading requirements for later check. Next, start to design the plan:
Step 1: Click [Cargo] on the left to enter the cargo interface. For there are lots of cargo types, it’s better to add them in batches through a container loading excel template. Firstly, click [Add Cargo>Get Excel Template] to download the container loading Excel template and save it to a certain location in your computer.
Secondly, fill in the template with the cargo information.
①Copy the name, quantity, length, width, height, and weight (gross weight of a single carton) of the goods into the template, which are required items. Pay attention to the matching of the units. “Weight”refers to the gross weight of a single carton or box of goods. If the cargo is too light, the “Weight”can be ignored and not filled in, and the system will default it as “1”.
②Then define the load orientations of the goods. For it is required that cargo B C D can only be placed with the height vertical to the ground, that is only “stand” and “stand & rotate” are allowed for cargo B, C, D, you should fill in “0” under the “allow” Column of other placement orientations for cargo B, C, D. “0” means not allowing such load orientation, leave it blank or “1” means allowing.
For there are no other requirements, you do not need to set other parameters, leave them as the default value. Save and close the template when finishing it.
Thirdly, return to the [Cargo] interface, click [Add Cargo>Import From Excel], choose the template in the dialog box, and open it. Then the cargo information will be imported to the container loading system.
Step 2: Click [Container] on the left to enter the [Container] interface. In this case, we need to calculate how many 40GP are needed to load all these cargoes. Click [Import from Database], check the 40GP in the pop-up box, and then click [Add]. Edit the corner castings size and reserved size of the container, the size of the corner castings is 10×10×10cm.
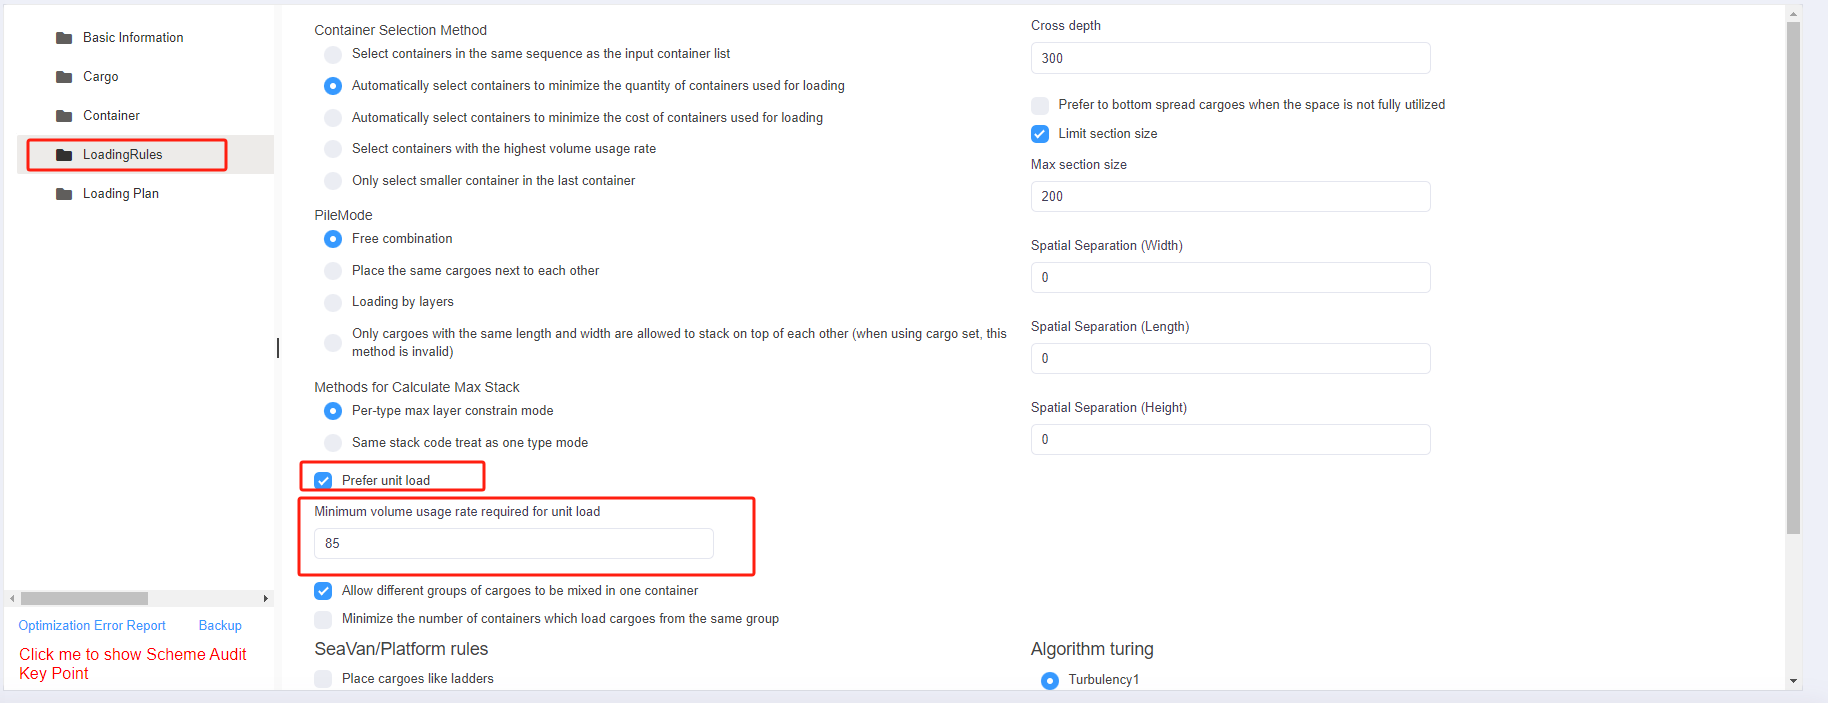
Step 3: Set the loading rules on the [Loading Rules] interface.
For it is required to generate unitload container first, check [prefer unit load], and pay attention to setting the [Minimum volume usage rate required for unit load]. In this case, let’s first calculate the plan based on the default value 85% in system to see the load planning result through the 3D container loading diagram.
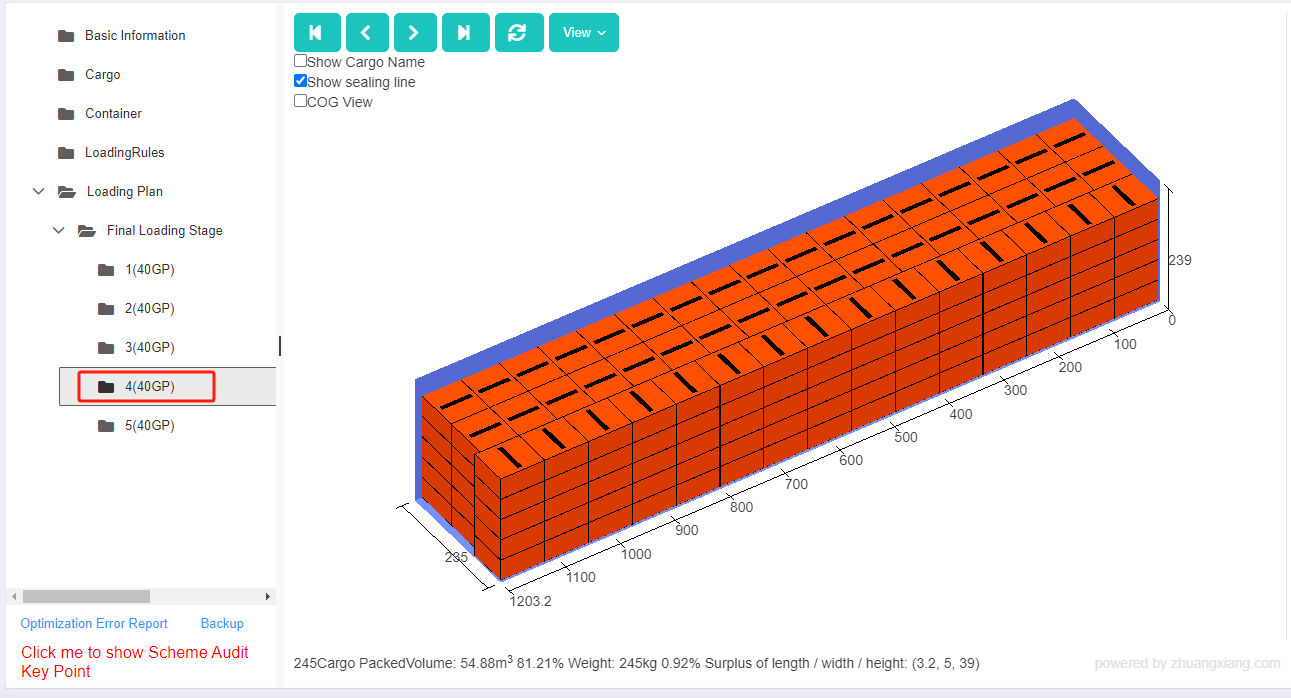
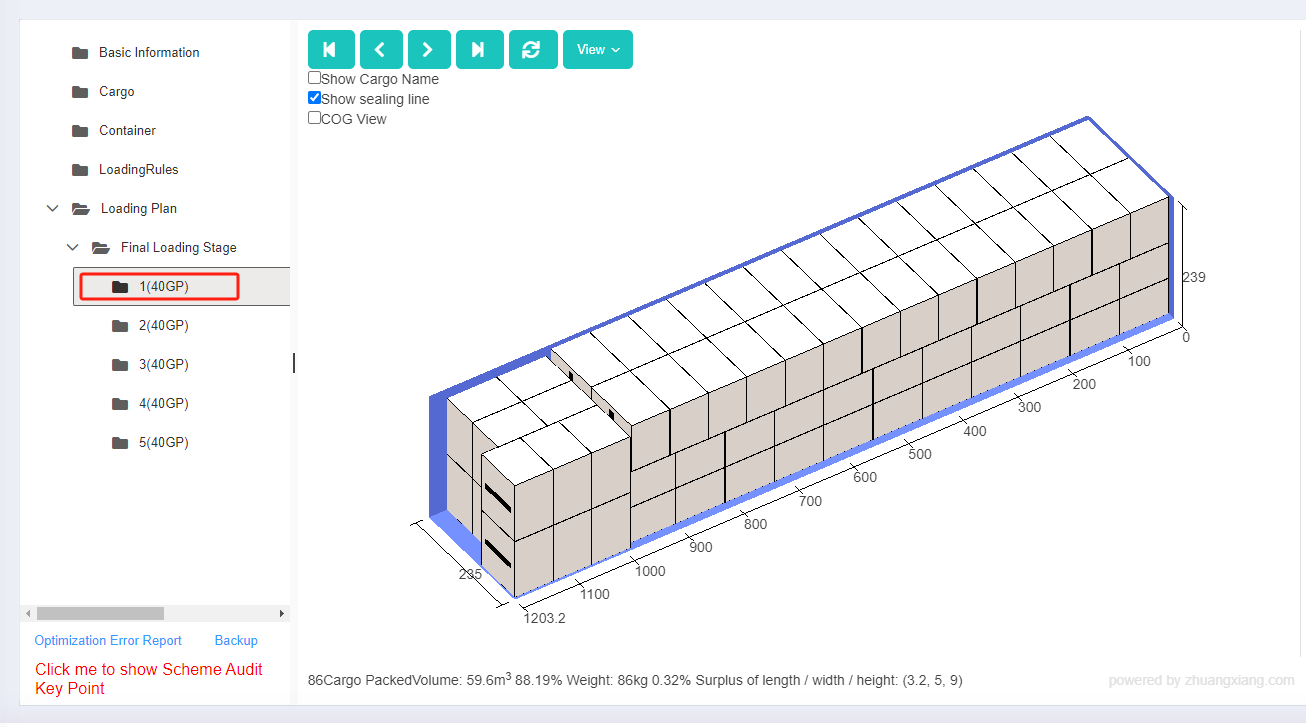
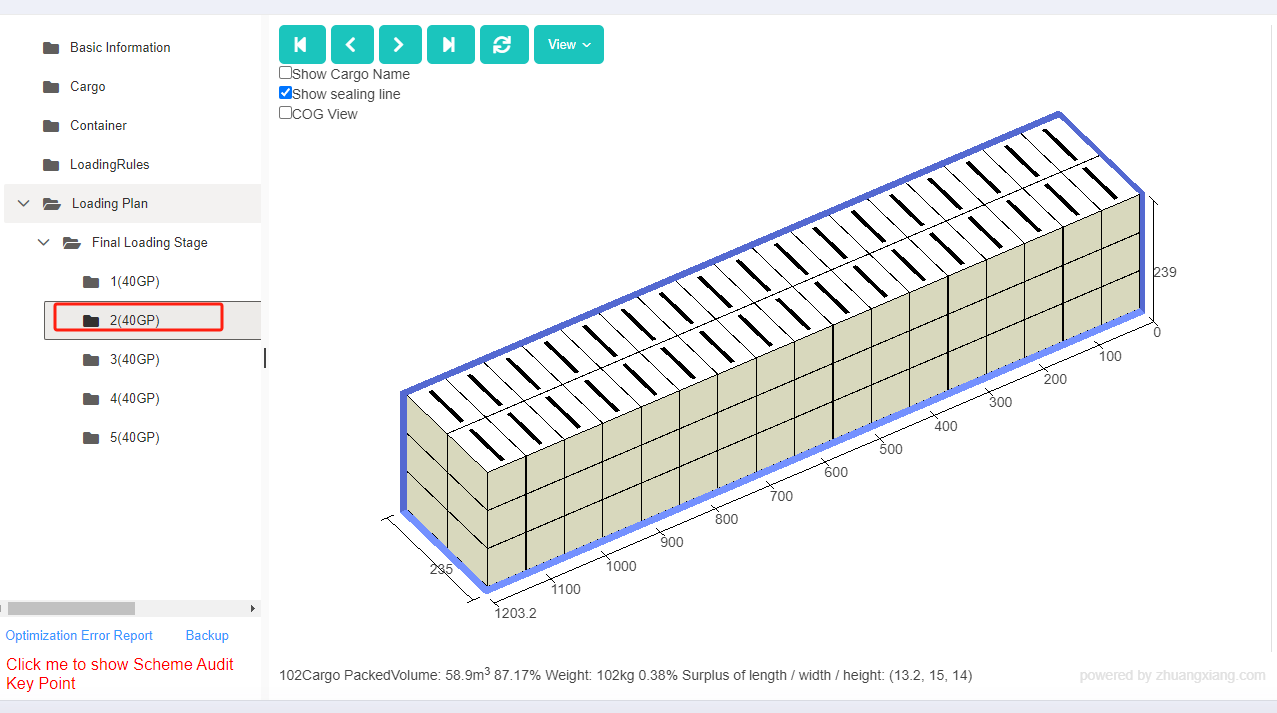
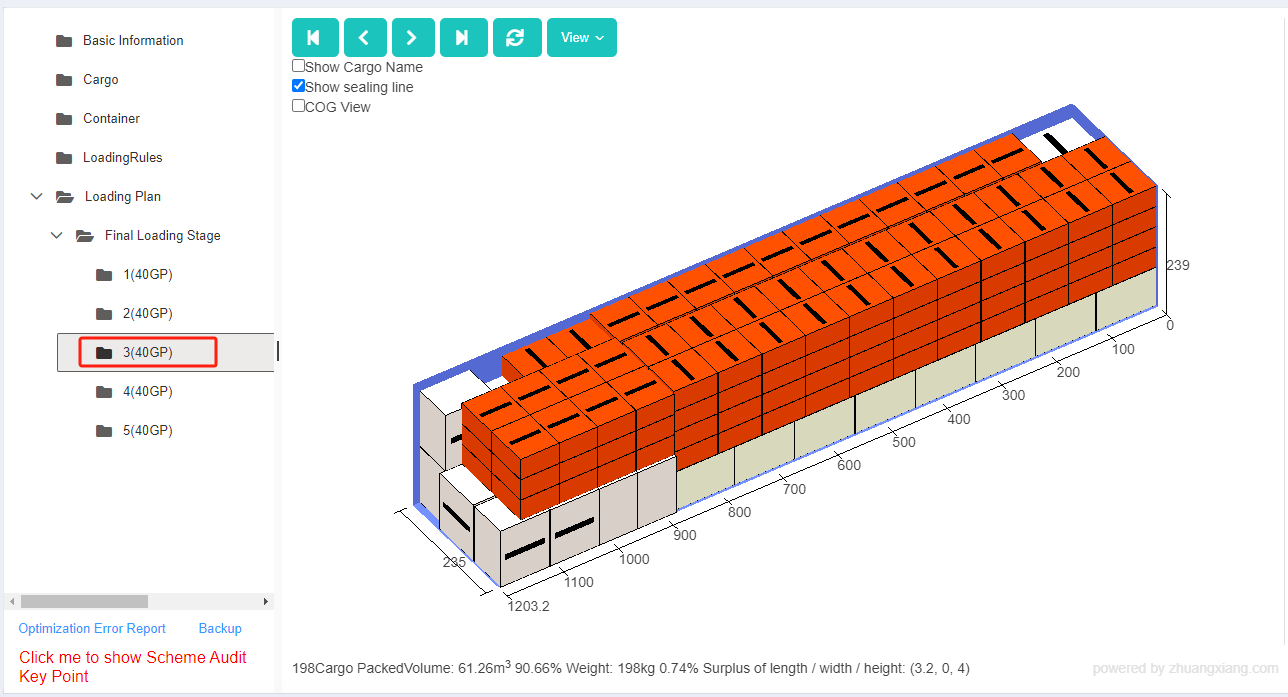
Click [Loading Result] to get the 3D cargo loading plan. In the container list on the left, you can see that this batch of goods has been loaded with five 40GPs. Click the container name, you can see the 3D loading effect of each container. The container 1 and 2 are all unit loaded containers, and the next three containers are mixed loaded. Since the minimum volume usage rate required for unit load is 85%, so unit load containers won’t be generated if this rate cannot be reached, which is why the next three containers are mix loaded.

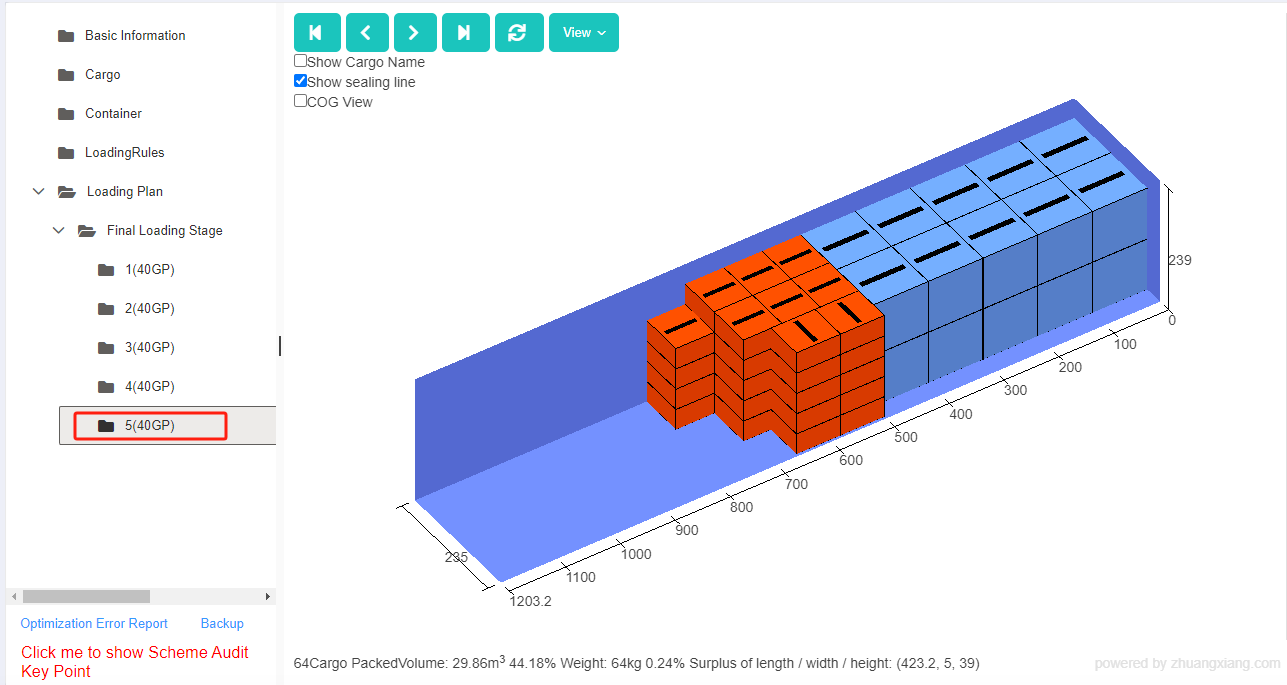
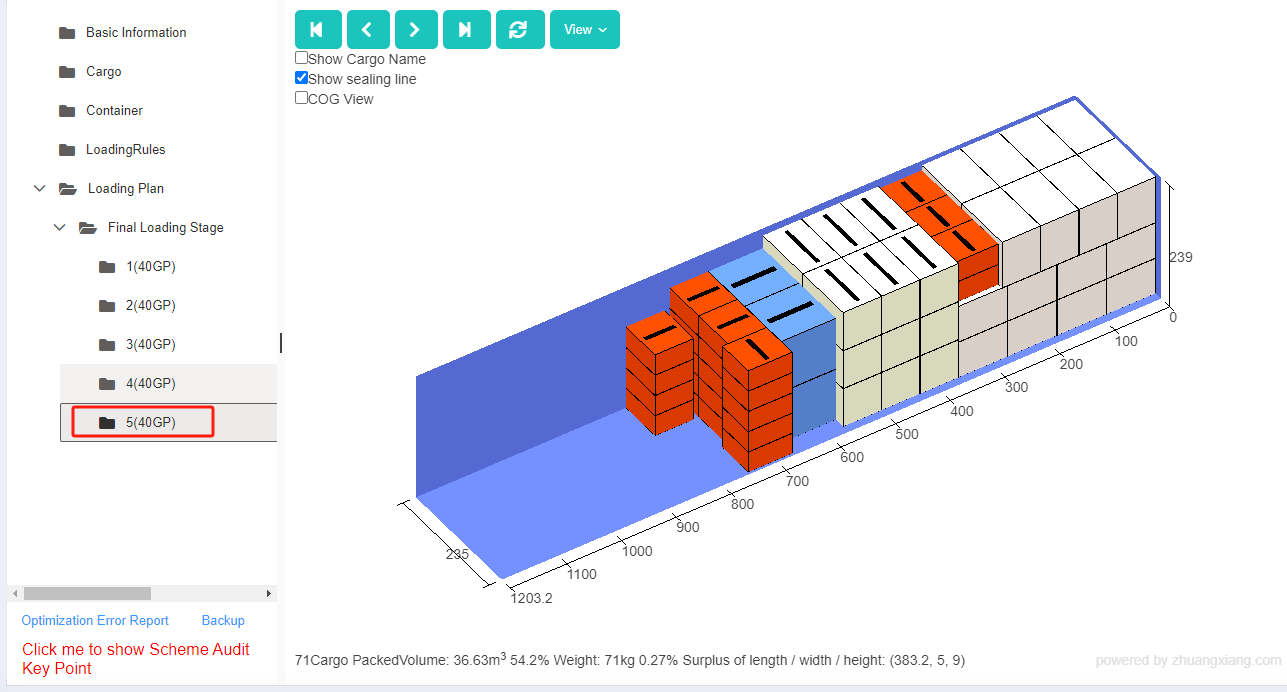
Next, set the [Minimum volume usage rate required for unit load] to 60%, and see if there is any change for the load plan. Click [Loading Result] to regenerate the cargo loading plan. Click the container name respectively, you can see that the first four containers are all unit loaded, the remaining goods are mixed and loaded in the last container, which fully meets the loading requirements.