Loading cargoes in a defined ratio into containers is a common loading requirement in the air conditioning industry. Especially when many different types of cargoes are required to be loaded in proportion and to attain the biggest container utilization rate at the same time, it’s extremely difficult for human computation to offer an optimal load plan.
For example, when exporting air conditioners, they are usually packed into two packages, one with an outdoor unit and the other with an indoor unit. The ratio of these two kinds of packages is 1:1 and it is required to not let the packages of outdoor units press those of indoor units, otherwise cargo damage is easy to appear. In some cases, different types of air conditioners would appear in the same order.
Under such circumstance, even if a load plan can be calculated by human labor, it has the following possibilities. One is that there is much space wasted in containers although the ratio of cargo numbers is guaranteed. The other is that calculated containers cannot accommodate all cargoes, possibly delaying the shipping date and then the arrival date. Without cargoes being delivered on time, clients who have made the order cannot sell them in a timely manner and would complain about the delay, even worse, would choose another partner to ship cargoes. That is to say, there is a huge risk to lose these clients.
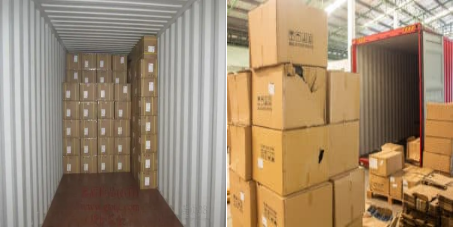 This is a unfull container.
How to avoid the tragedy? LoadMaster load planning optimization software can do you a favor! Let’s see how LoadMaster helps many well-known air conditioning companies such as Haier, Hisense, TCL, and AUX design optimal load plans!
For instance, air conditioning companyⅠhas made an order including three types of air conditioners, air conditioner A, air conditioner B and air conditioner C. Each type of air conditioners have two kinds of packages, one with outdoor units and the other with indoor units. And the ratio of these two kinds of packages is 1:1. Also the packages of outdoor units cannot press those of indoor units.
First, download the Excel template of cargoes and then fill in the columns of Name, Quantity, Length, Width and Height which are all required. Then, fill in Cargo Set Name and Quantity in Cargo Set. In this example, we can fill in the column of Cargo Set Name with A, B, C and the column of Quantity in Cargo Set all with 1.
Next, set Stacking Orders which indicates loading capacities of different cargoes and is a relative value. The larger number, the bigger loading capacity. Therefore cargoes with bigger Stacking Orders should be put lower then others with smaller Stacking Orders. In this example, outdoor units cannot press indoor units, which means that outdoor units have bigger Stacking Orders and indoor units have smaller Stacking Orders.
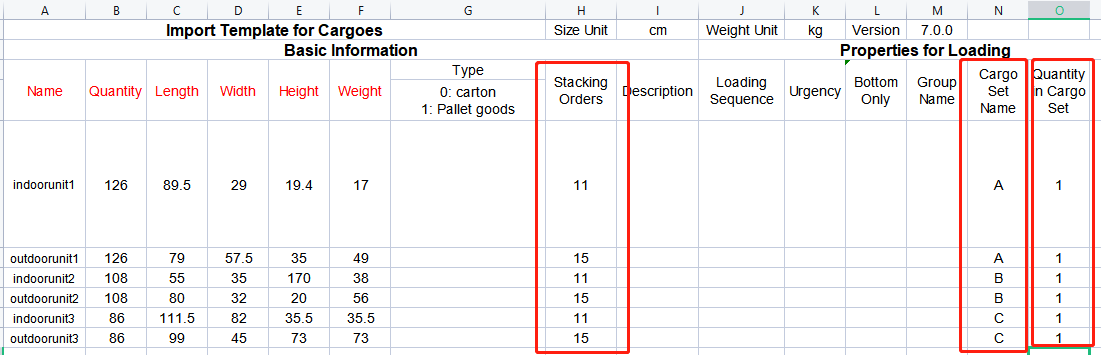 This is how to set the ratio in the template.
After setting cargo parameters, add frequently used containers and set corresponding parameters.
Finally, click Loading Plan and an optimal load plan would be calculated within 1 second by LoadMaster load planning optimization software.
 This is fast computing speed.
Via 3D diagram, you can clearly see that the ratio of outdoor units and indoor units is 1:1 and indoor units are all loaded on the top of outdoor units. Furthermore, the container utilization rate exceeds 90%. Plus, the load plan can be shared to other mobile platforms to guide on-site loading.
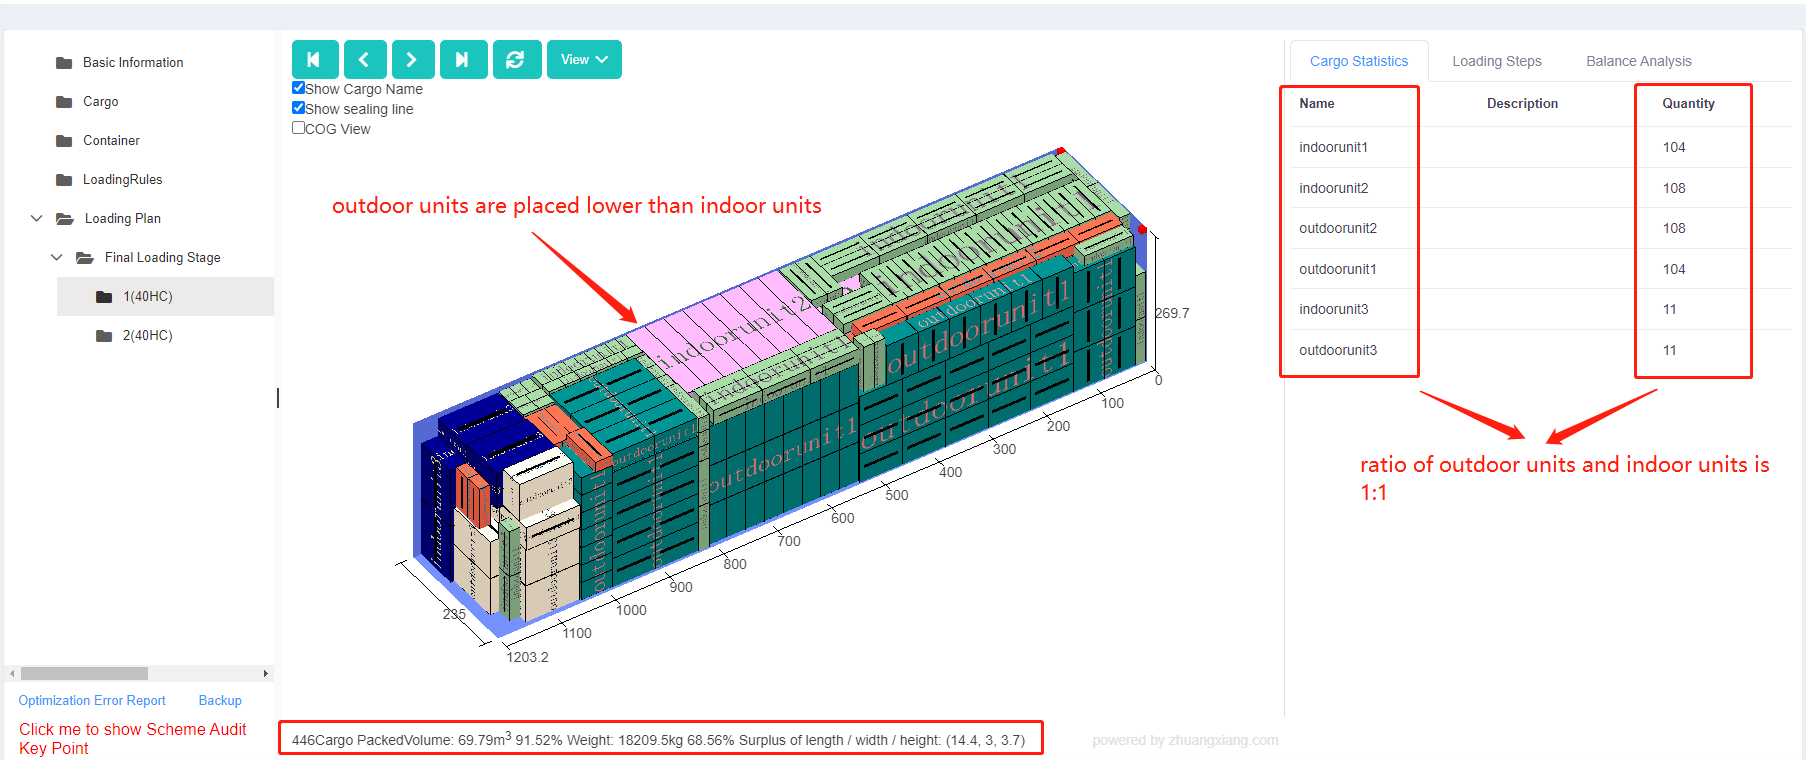 This is a 3d load plan with cargo loaded as sets.
LoadMaster always stands together with clients and aims to take each and every loading requirement of clients into consideration and then offers optimal load plans. Are you still disturbed by complex computation of container load plan? Come and apply for a 30-day free trial of LoadMaster load planning optimization software with full functions and without times limit at http://loadmaster.biz !
 Cargo dimension
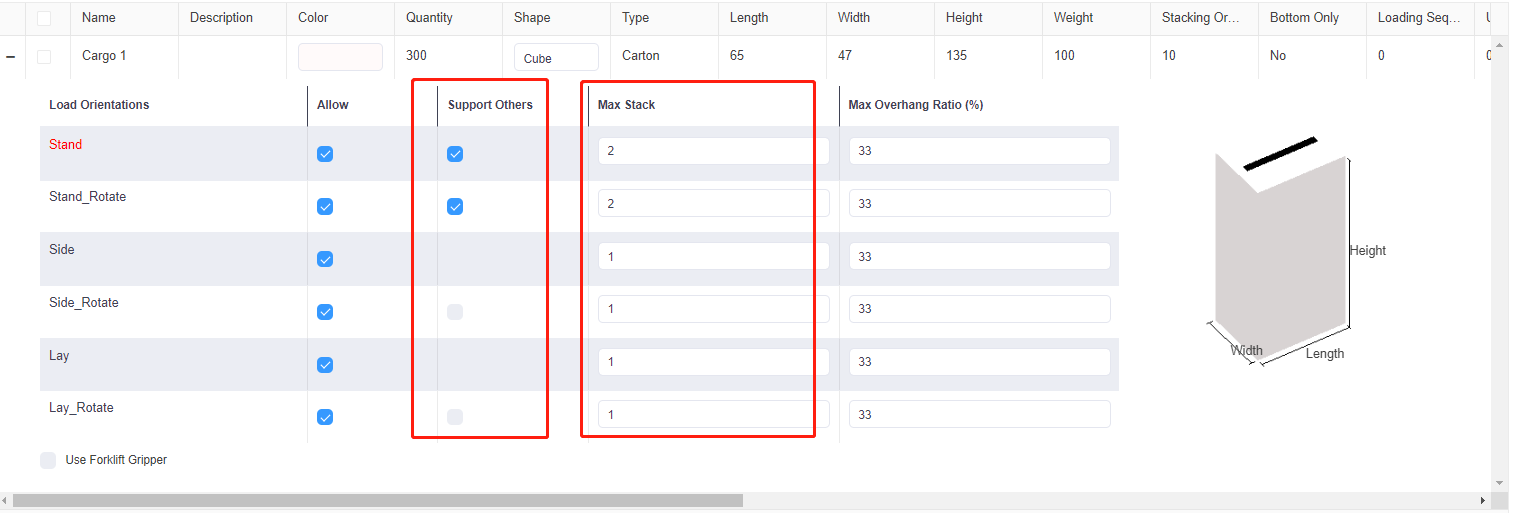 Cargo consttraints: support others and max stack.
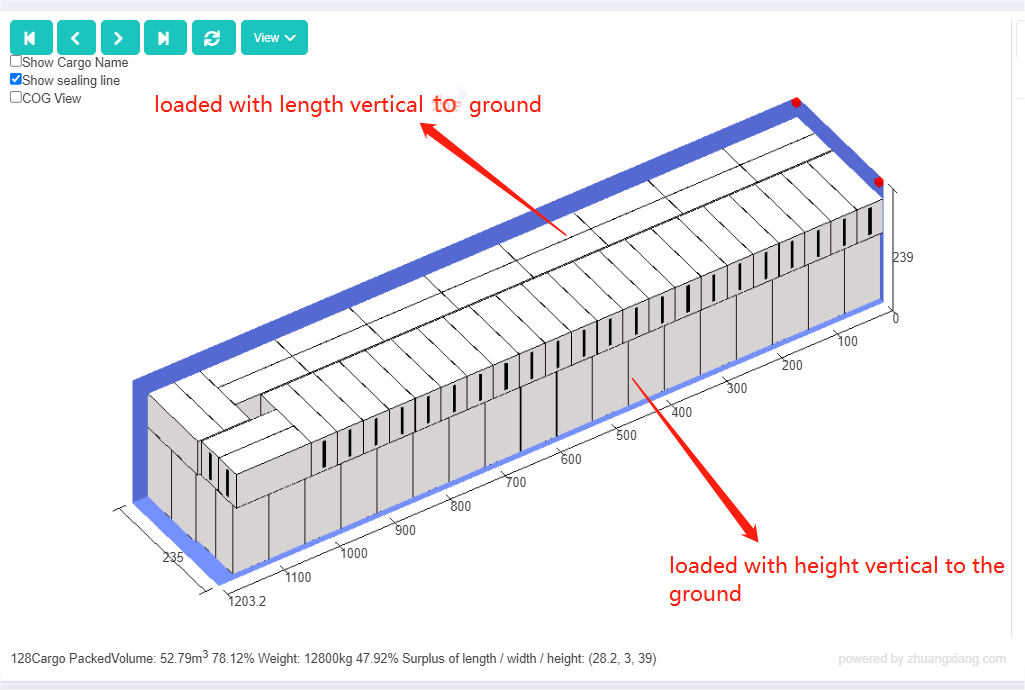 Same cargo with different placement orientations.
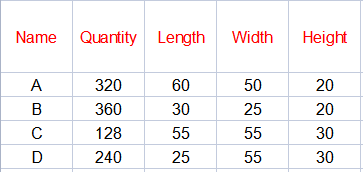 This is cargo dimension.
 This is placement orientation parameter set.
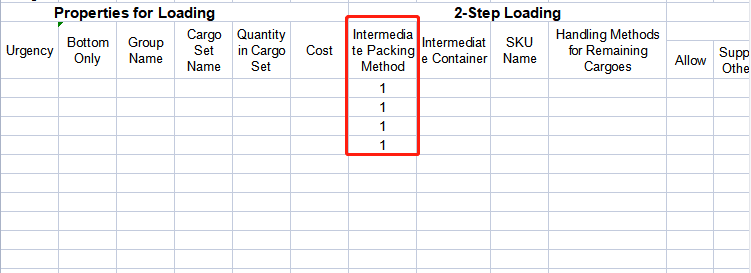 This is intermediate packing method parameter set.
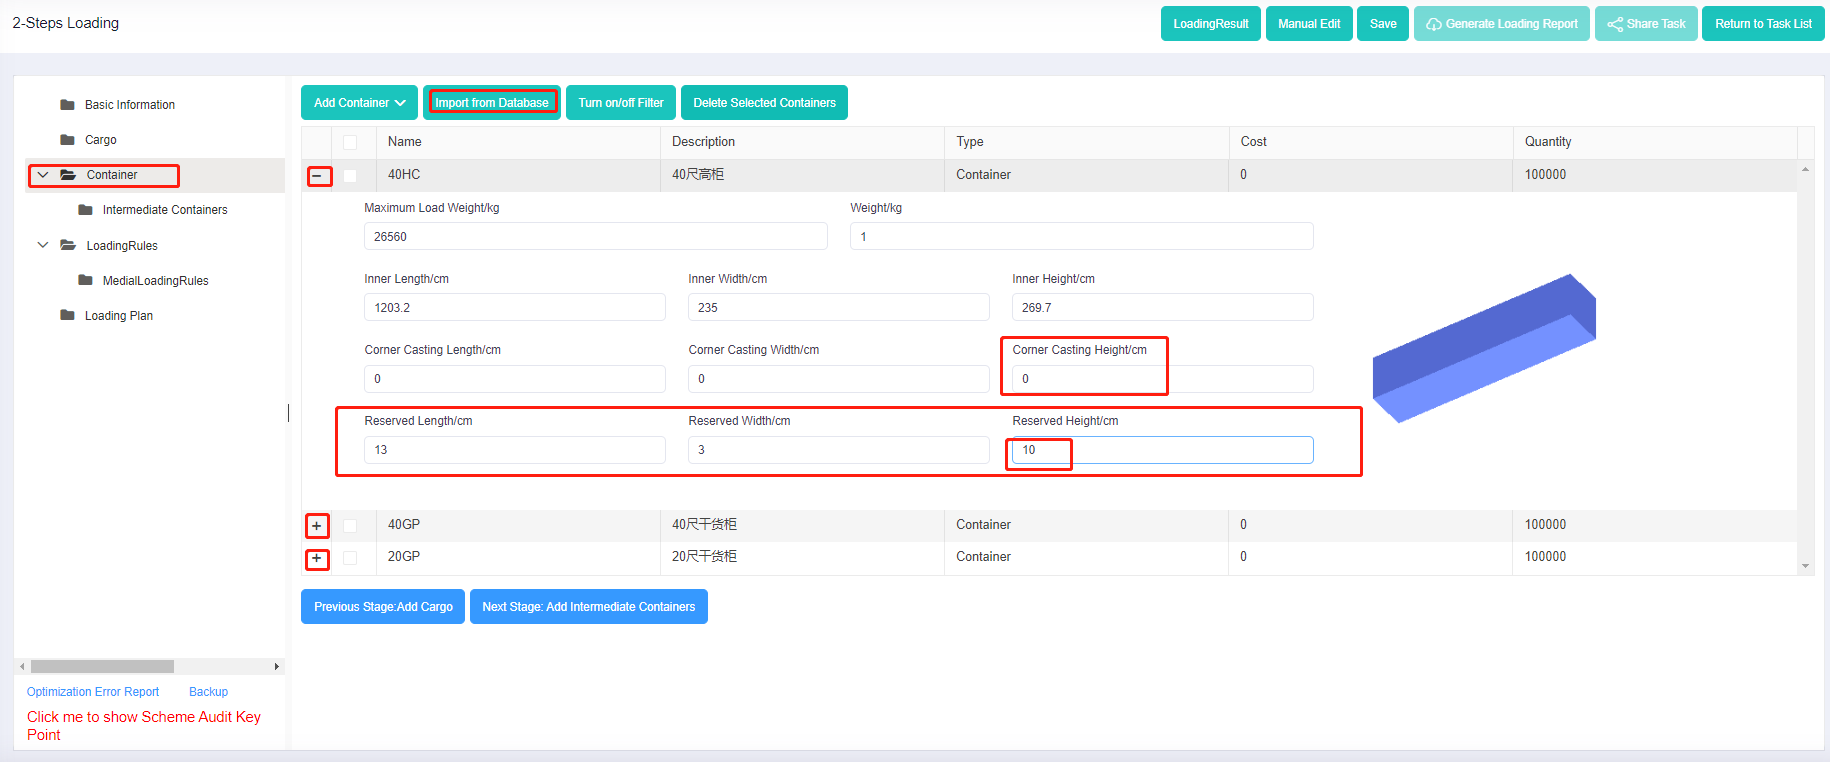 Corner castings and reserved size set.
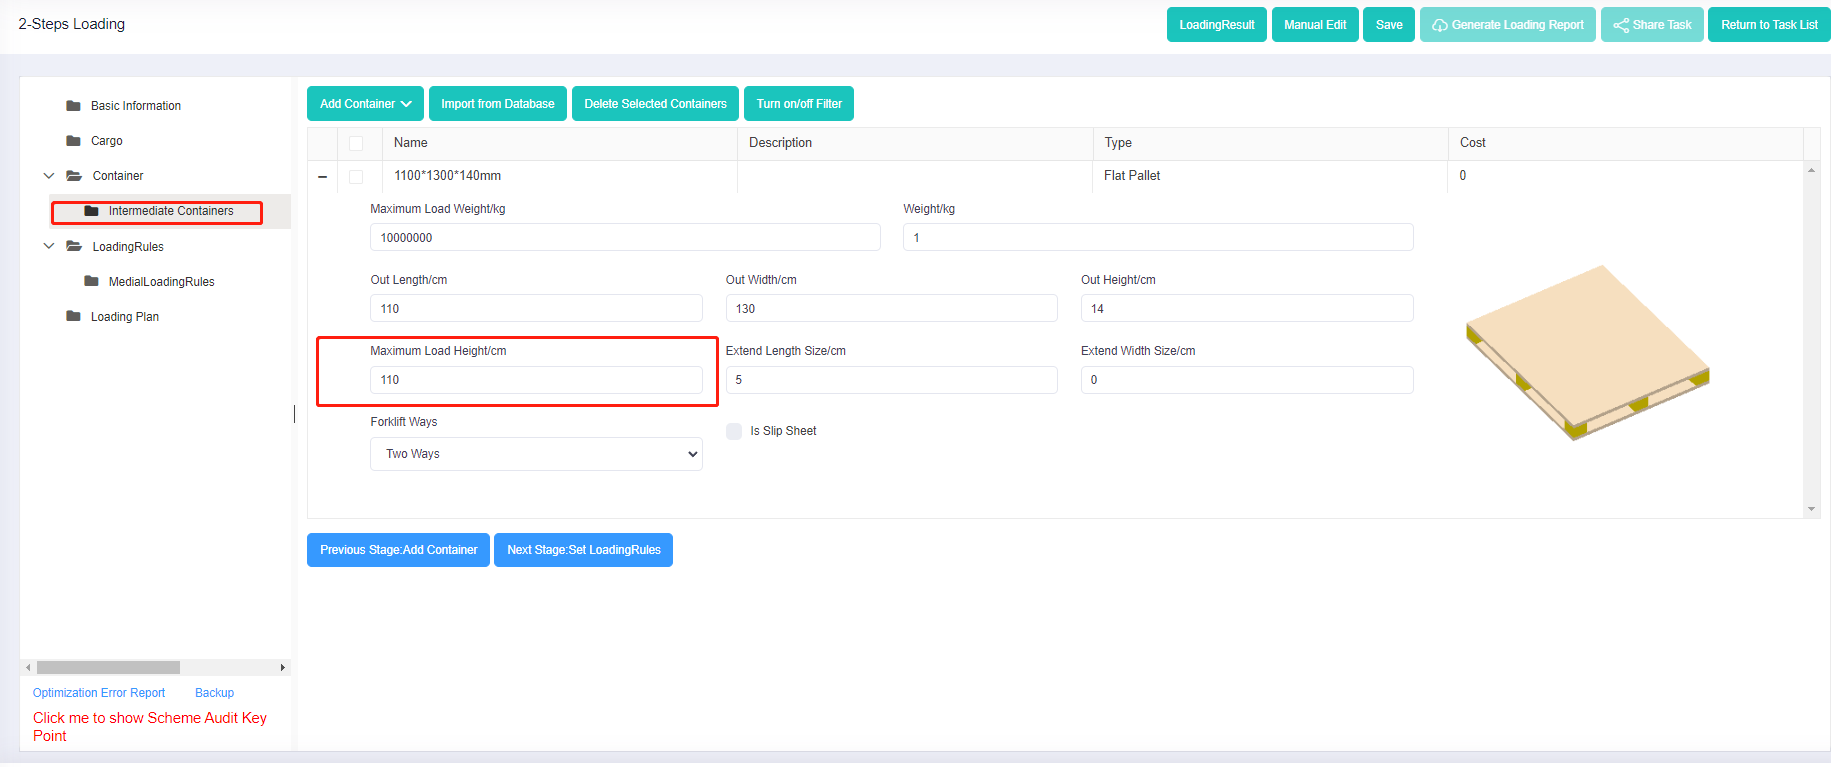 Maximum loadable height of the pallet.
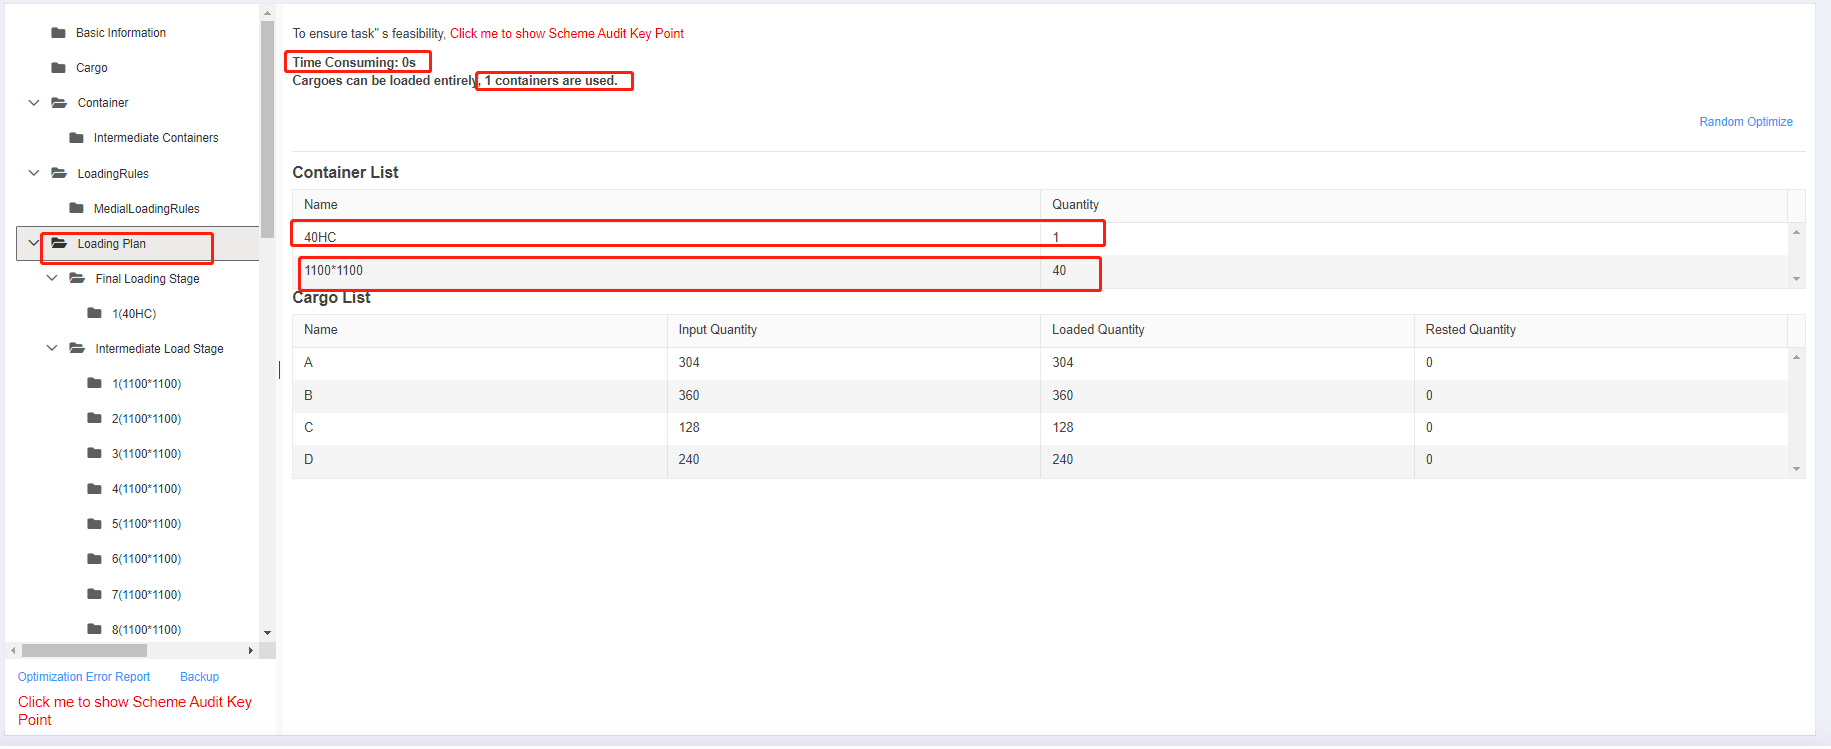 Loading summary.
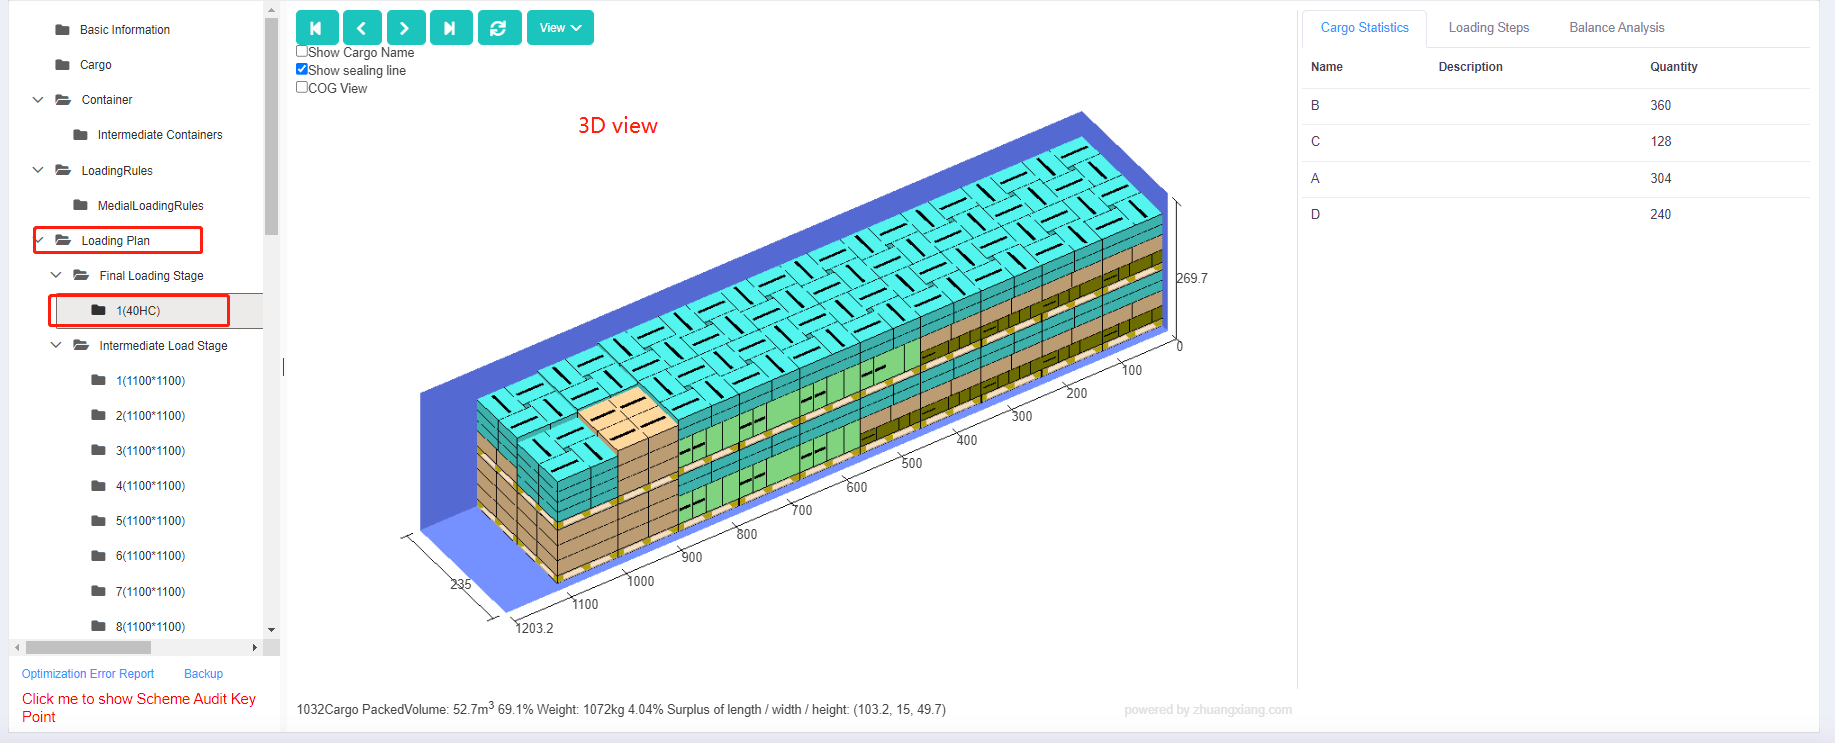 3d load plan diagram
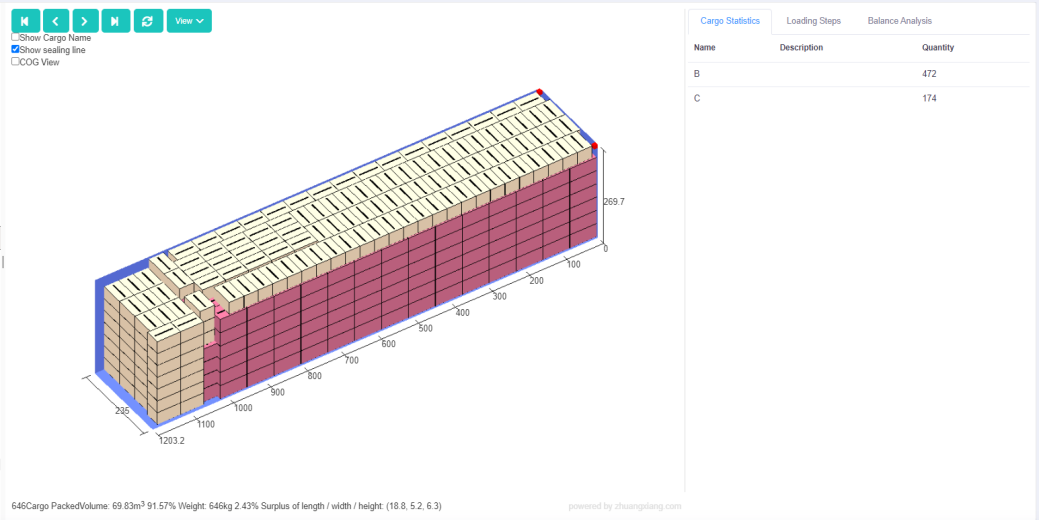 This is a container loading more cargo.
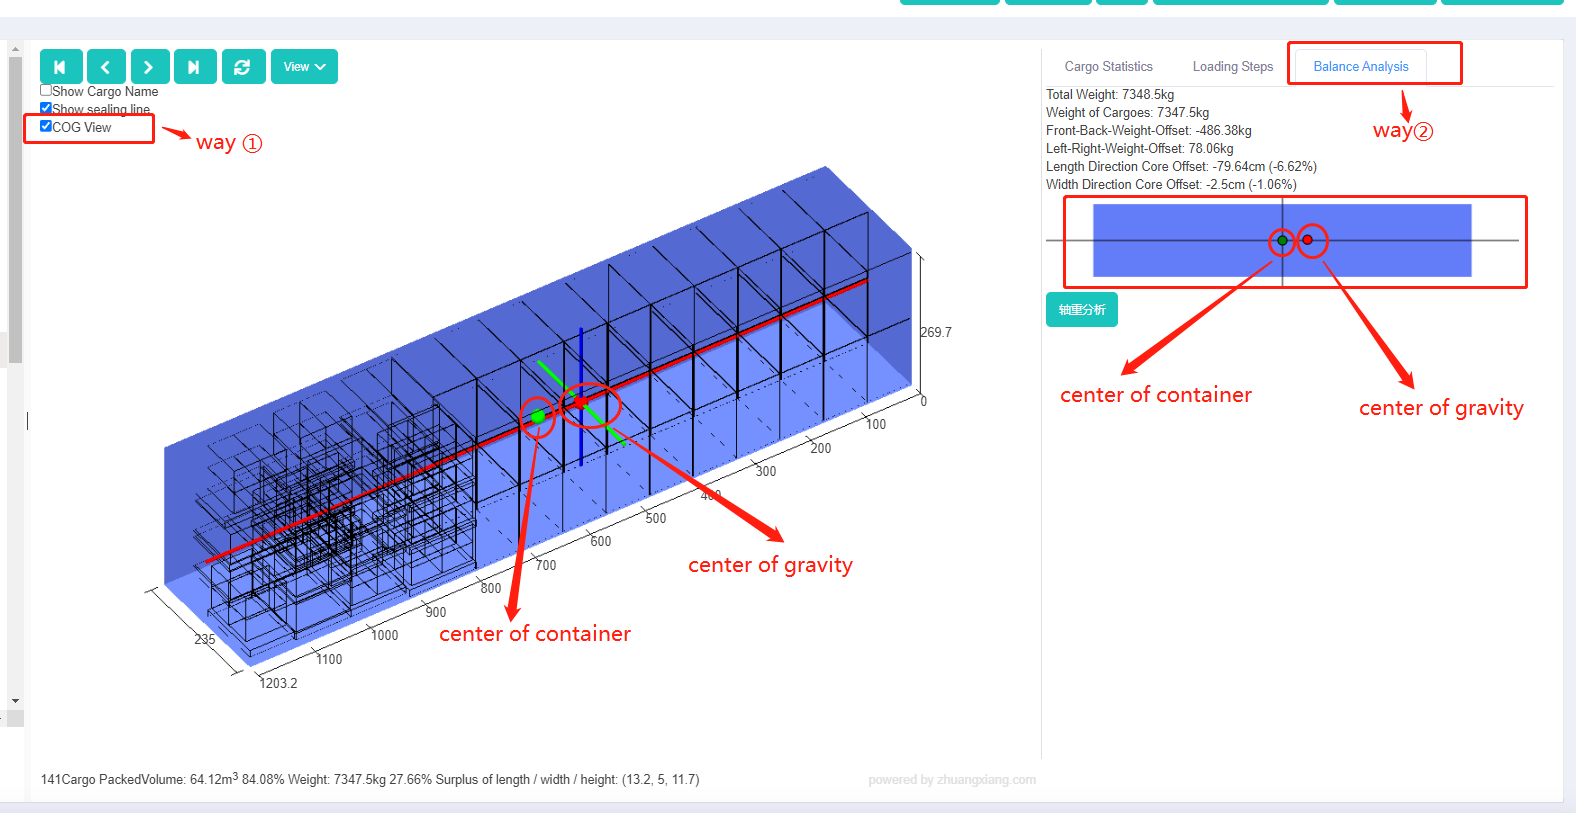 This is balance analysis in 3d load plan.
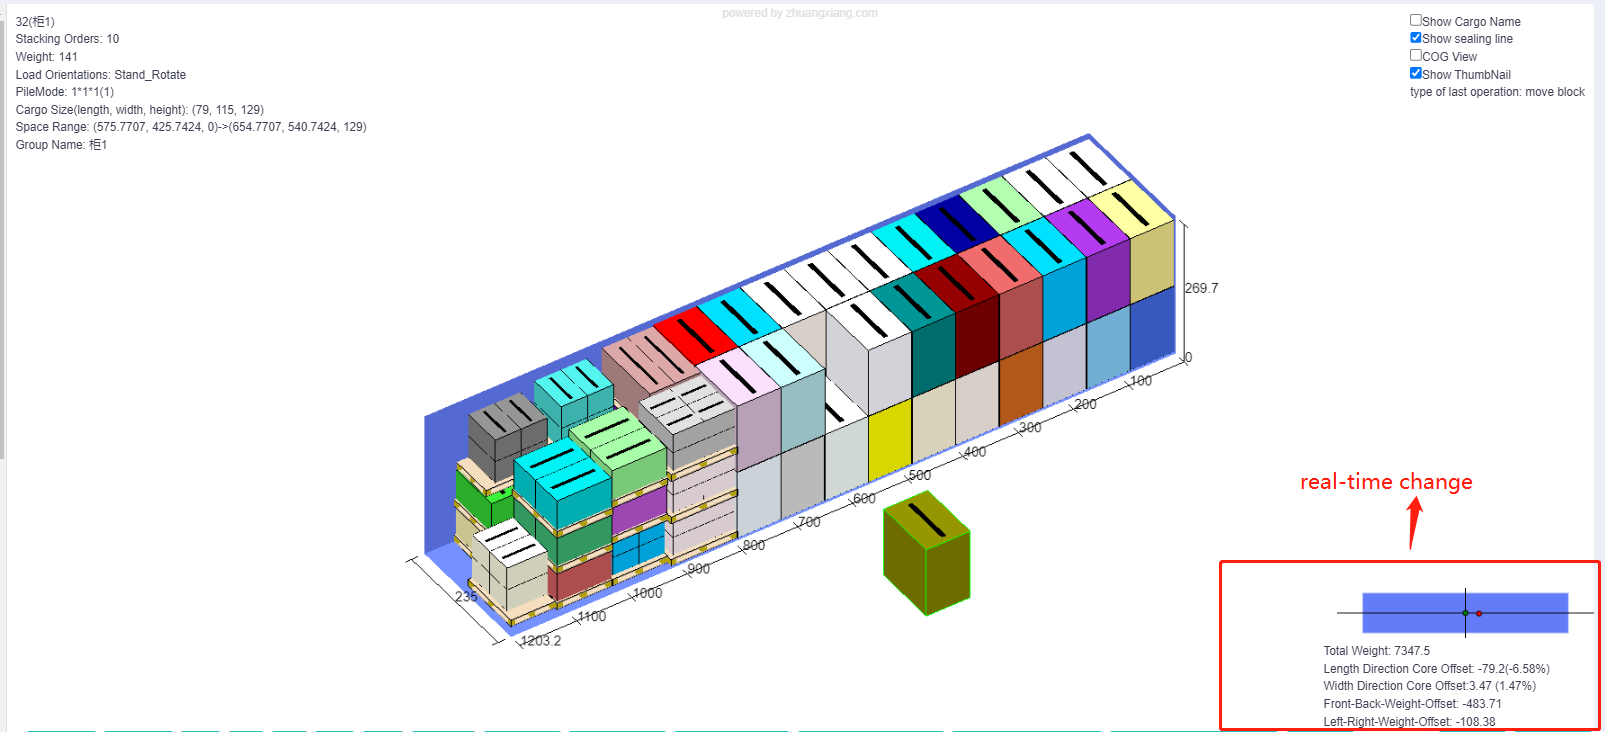 This is real-time change of the center-of-gravity in manual edit.
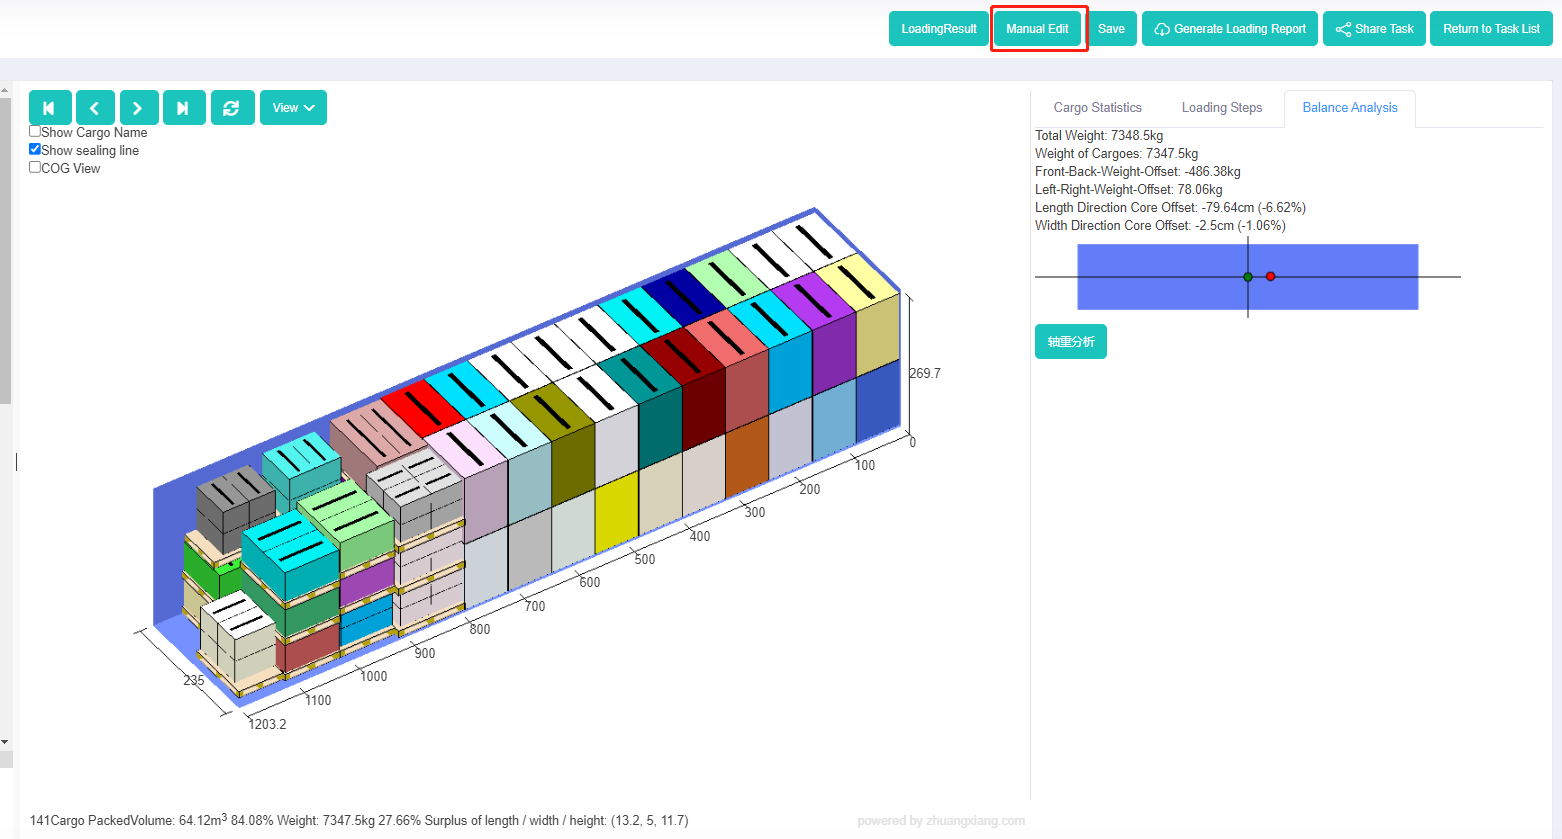 This is manual edit button.
 This is cargo database.
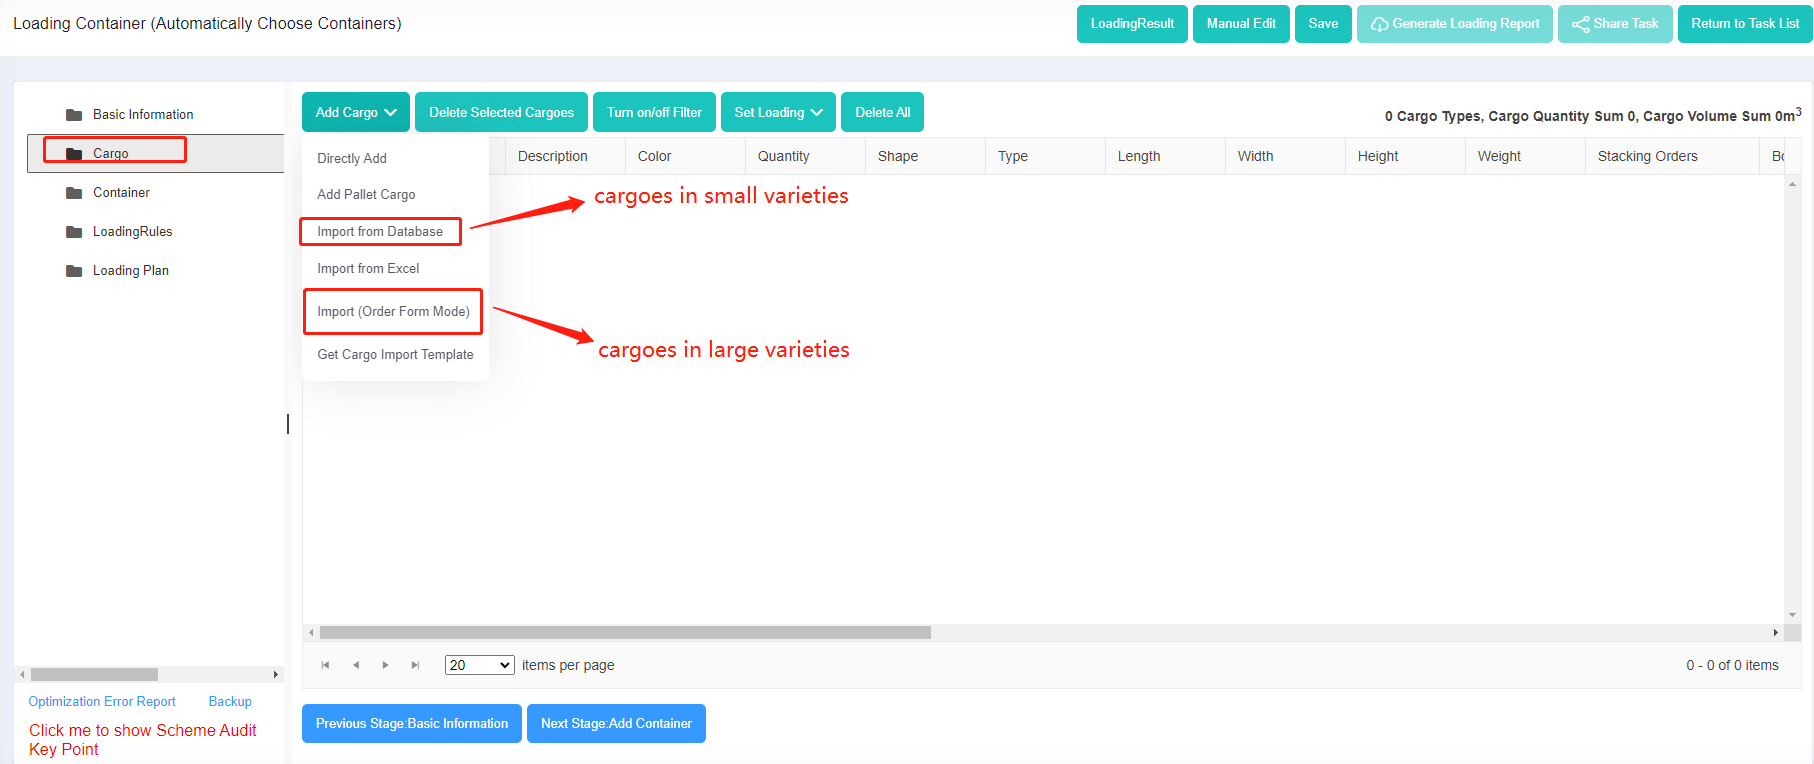 Two ways to add cargo with different quantities.
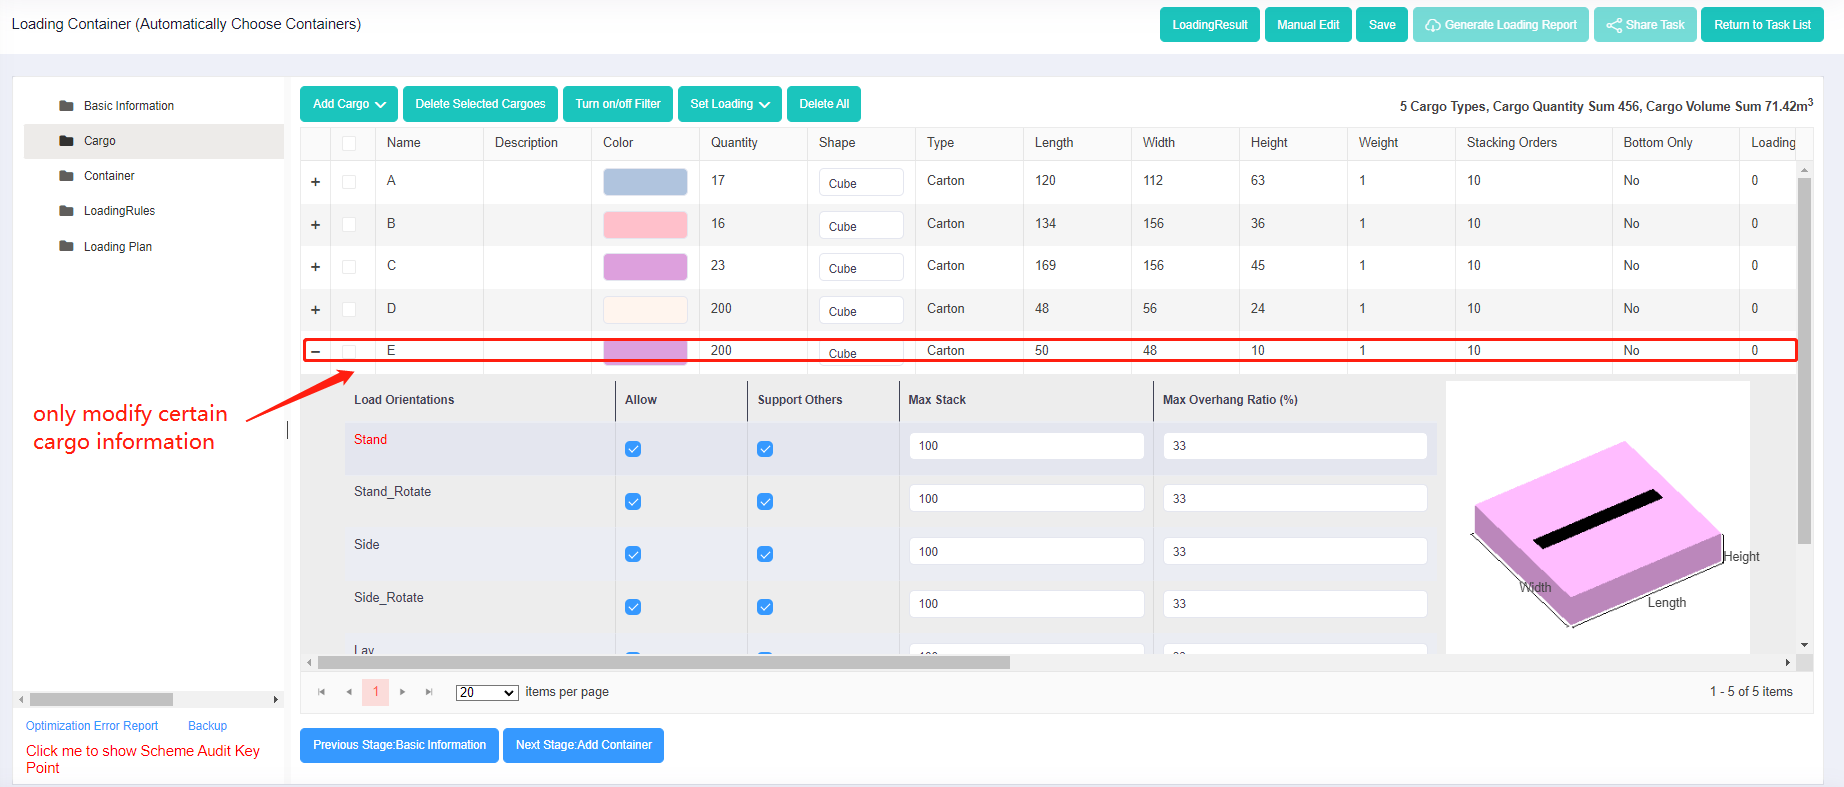 This is where to modify cargo information.
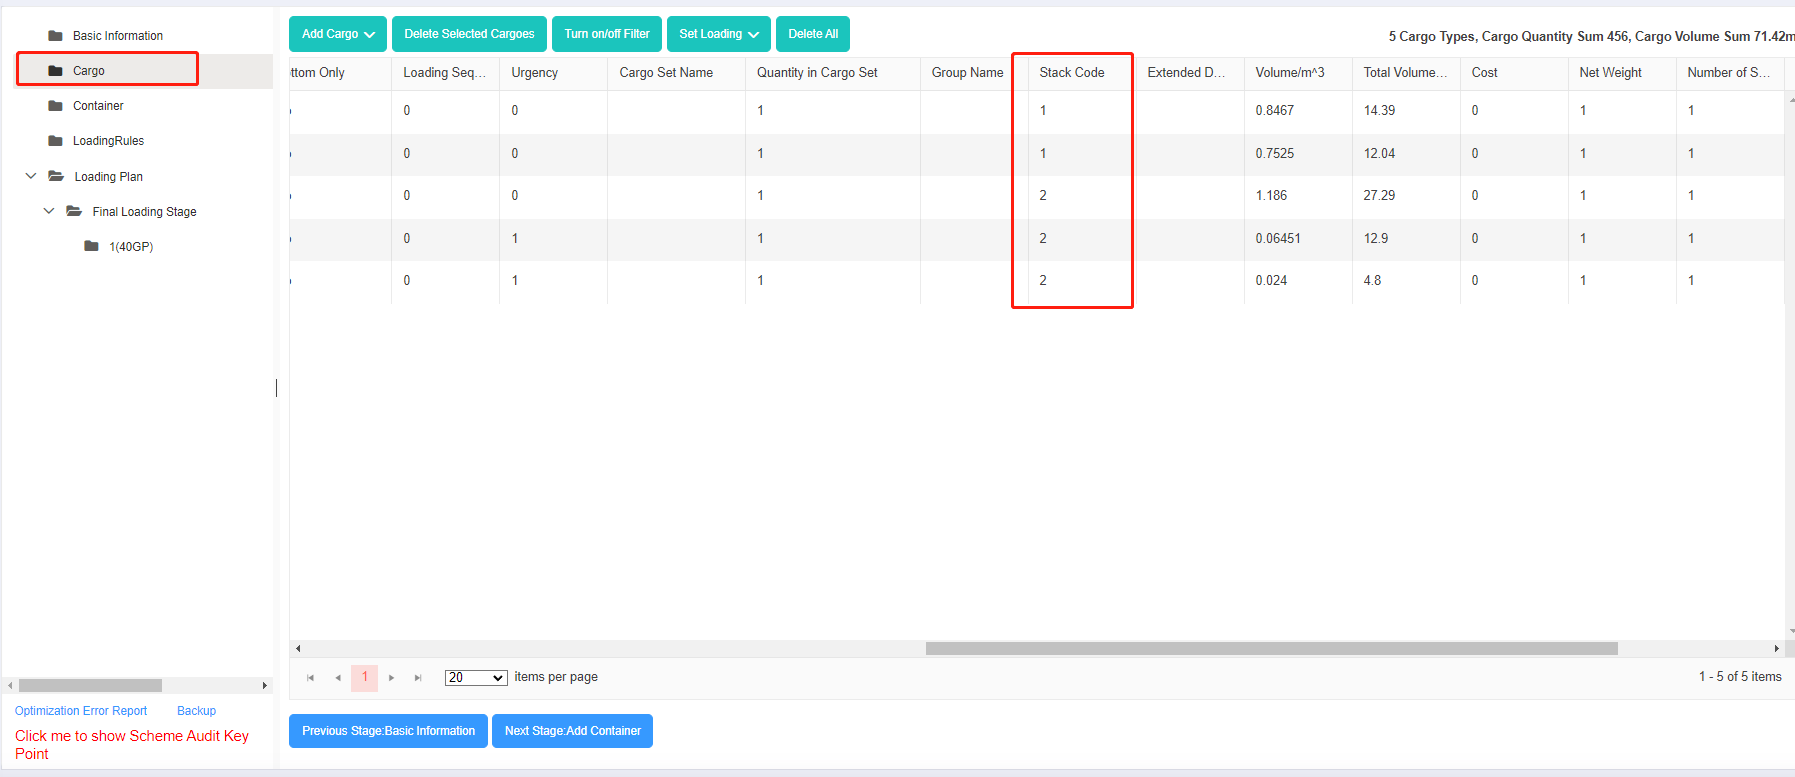 This is Stack Code interface.
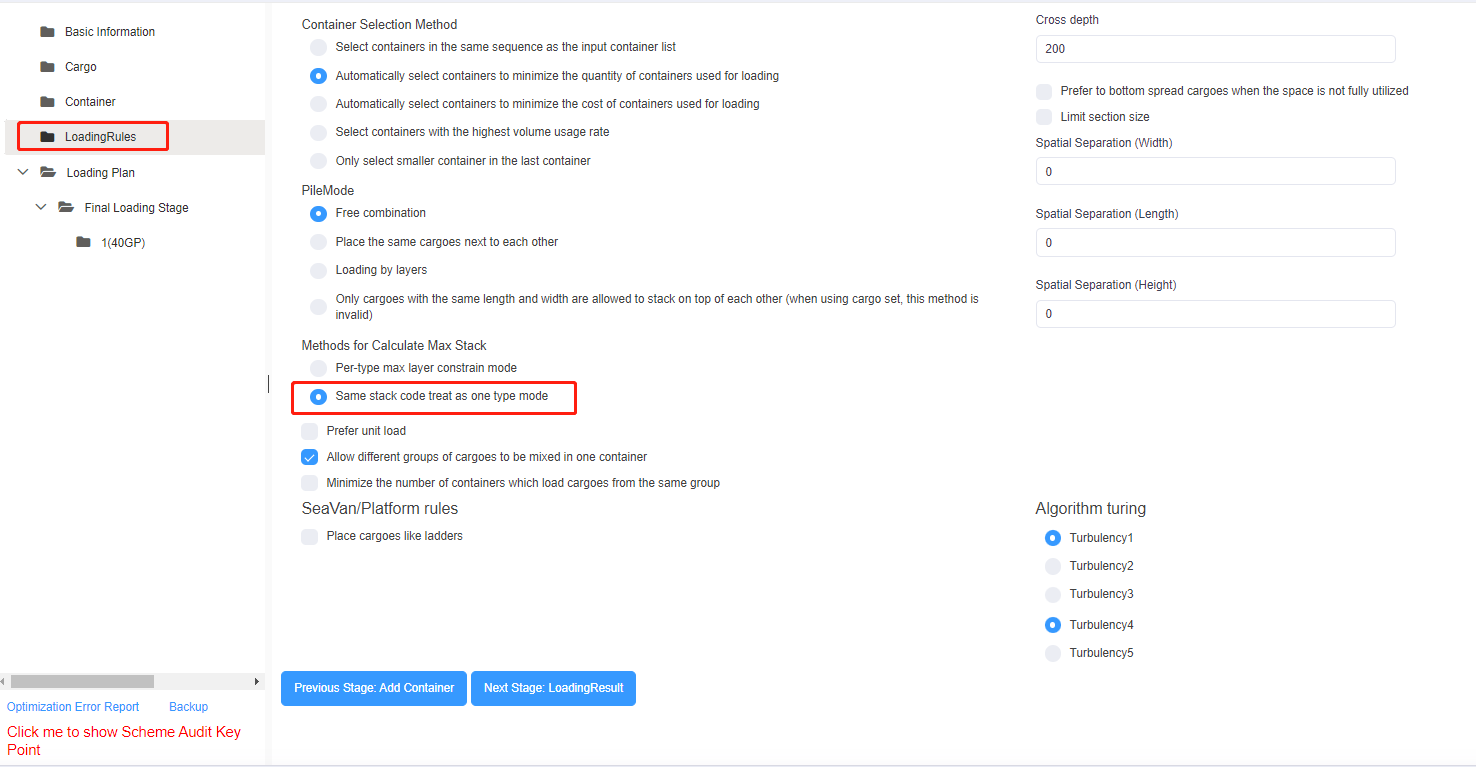 This is “Same Stack code treat as one type mode” rule.
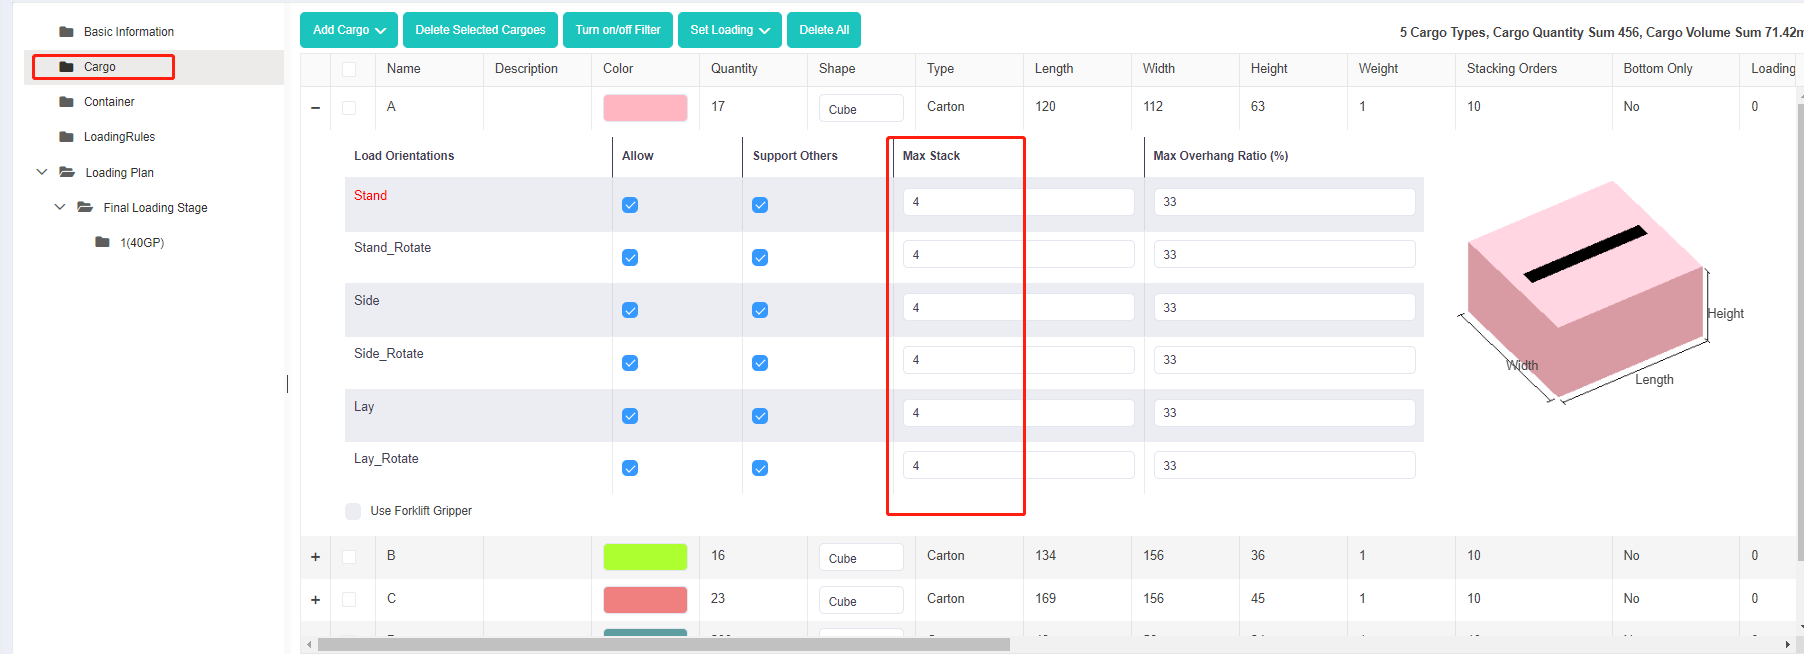 This is the same Max Stack.
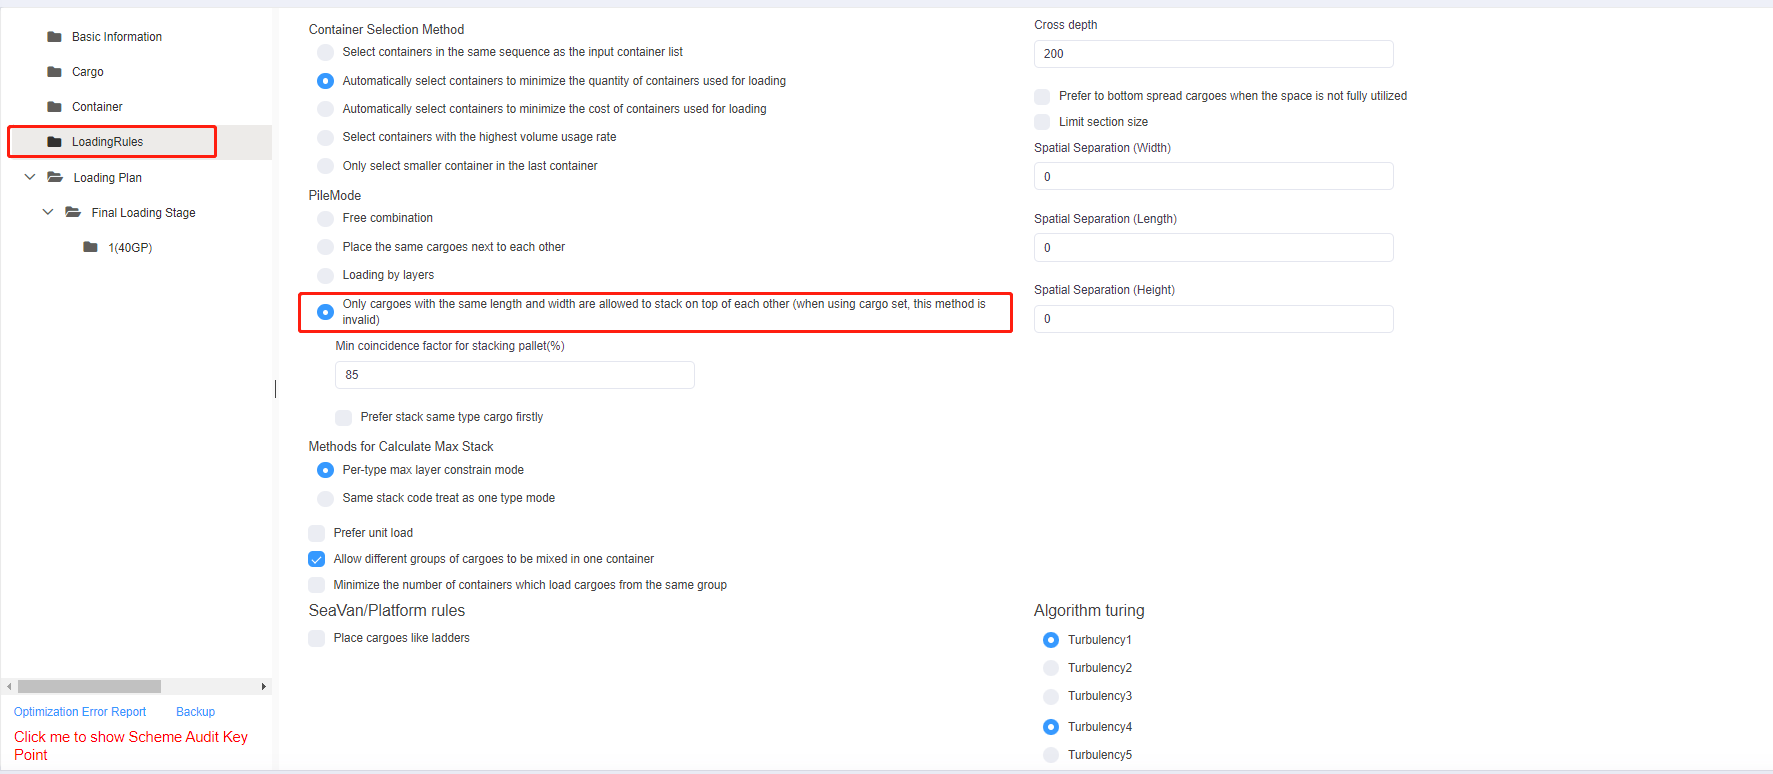 This is “Only cargoes with the same length and width are allowed to stack on top of each other” rule.
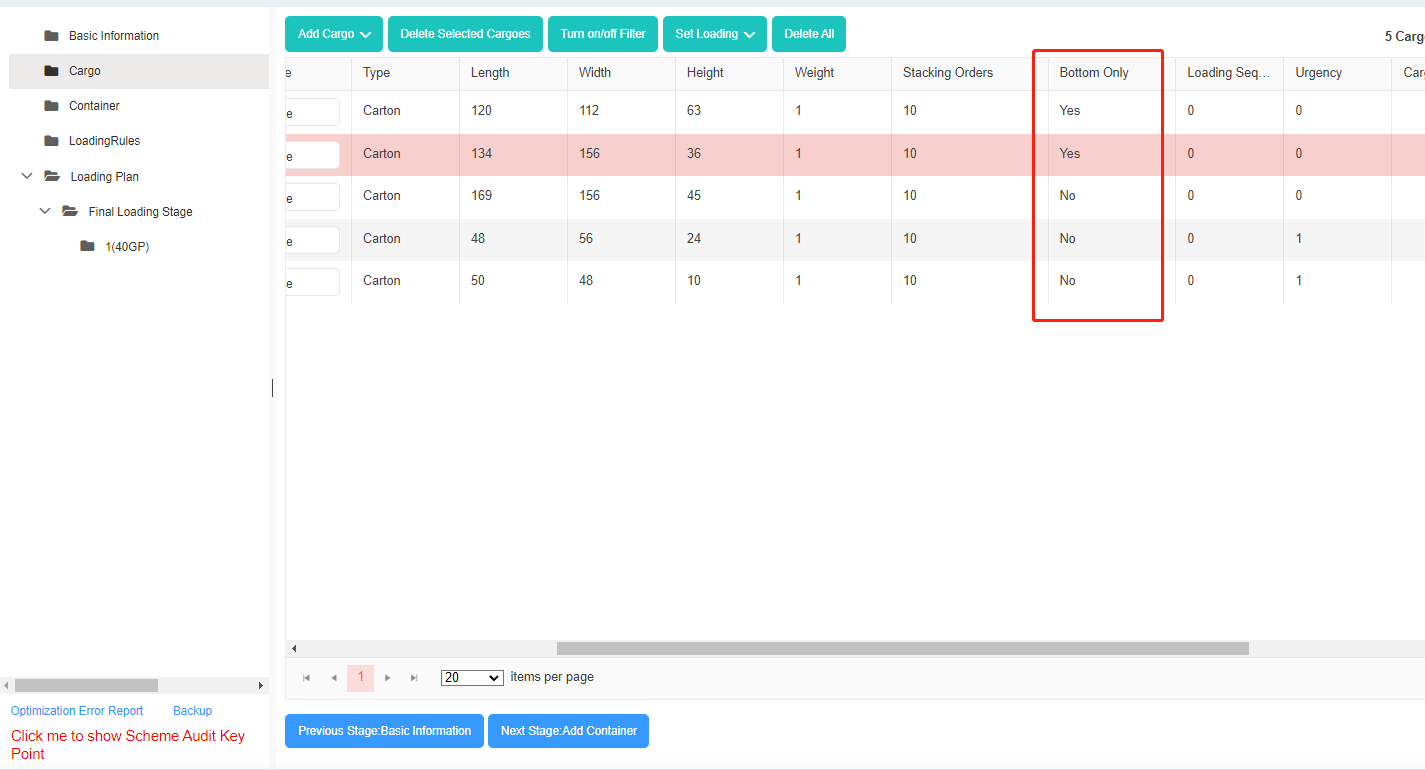 This is “Bottom Only” interface.
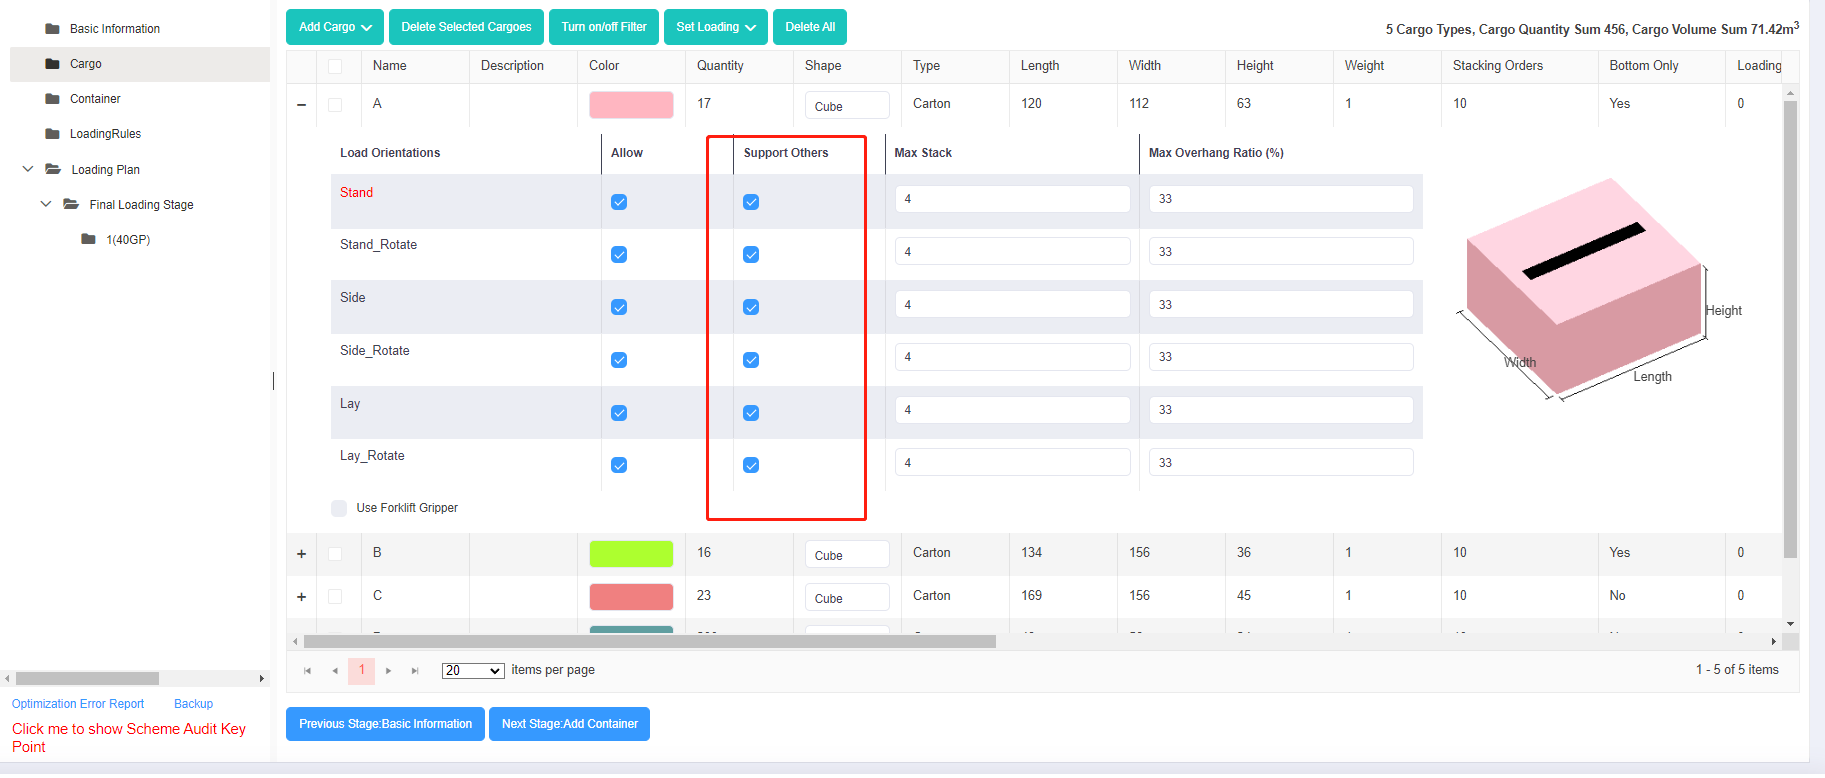 This is “Support Others” interface.
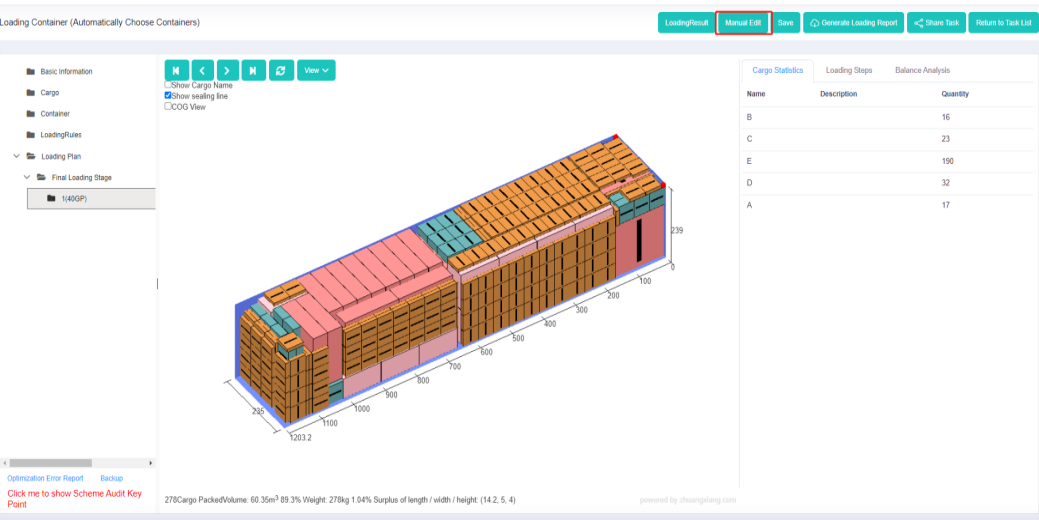 This is manual edit button.
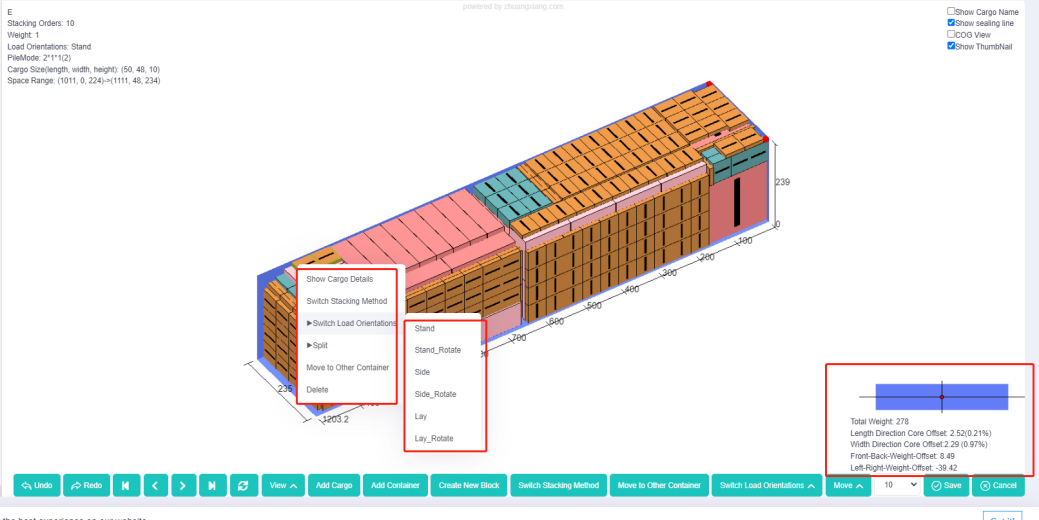 This is manual edit operation interface.
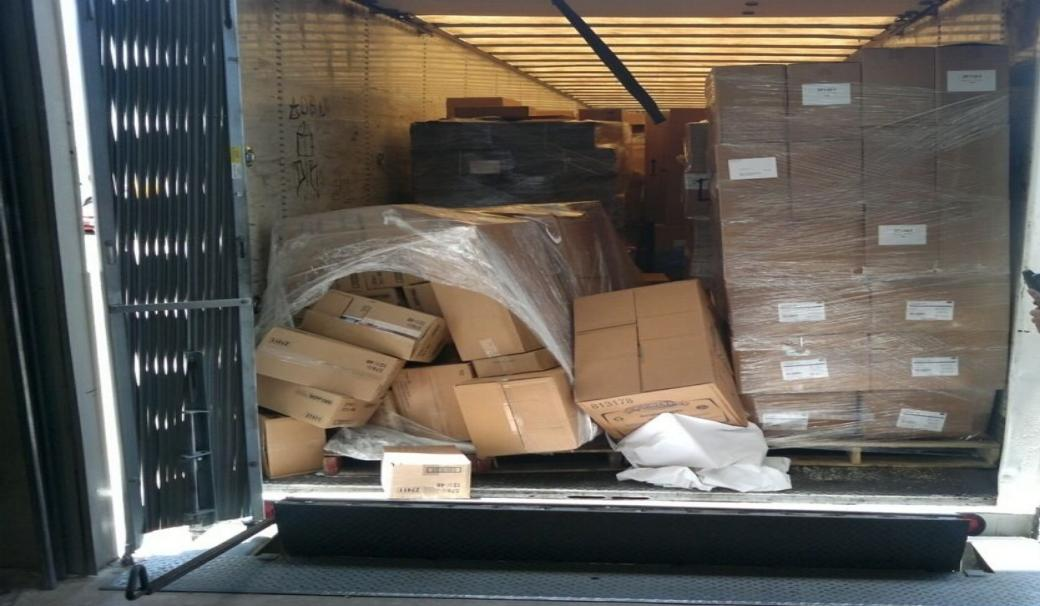 This is a container where the cargo falls down.
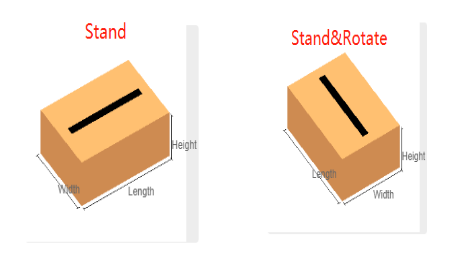 This is Stand, Stand&Rotate placement.
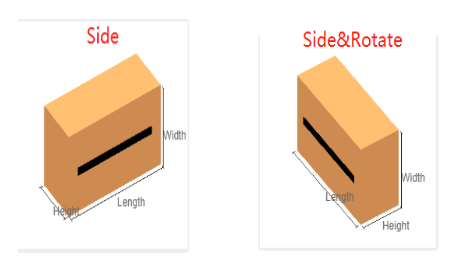 This is Side, Side&Rotate placement.
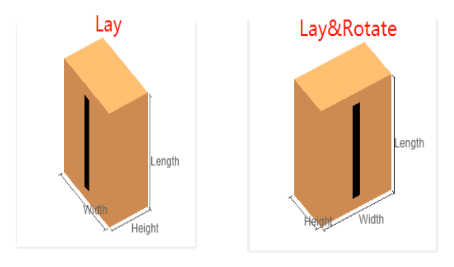 This is Lay, Lay&Rotate placement.
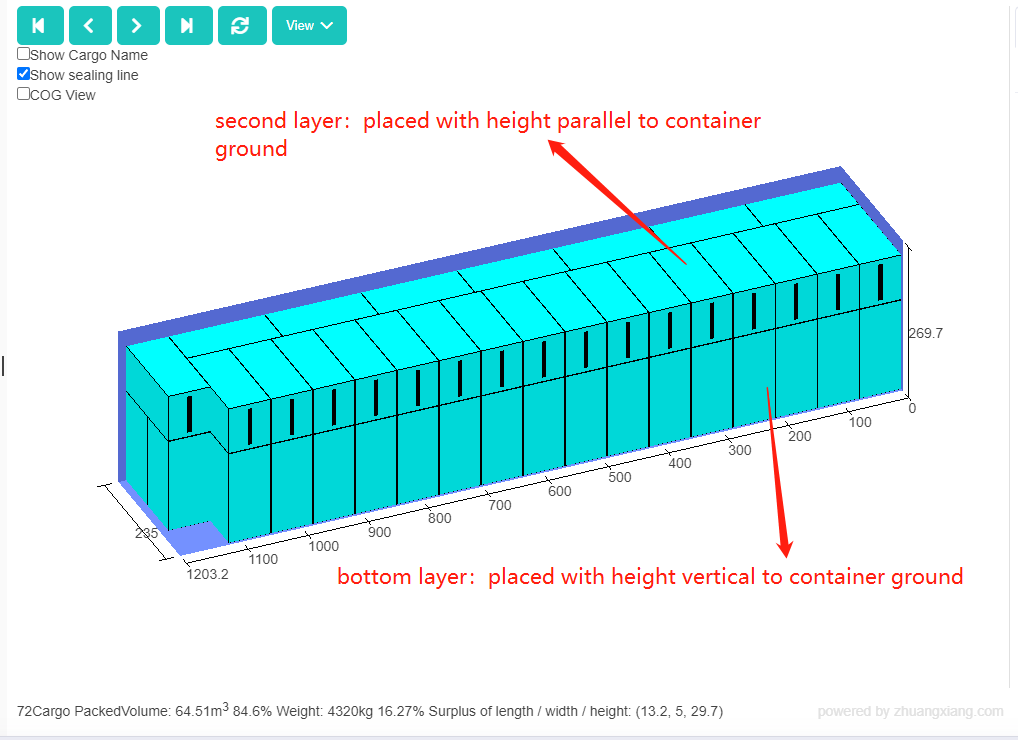 This is a picture of refrigerators with different orientations in a container.
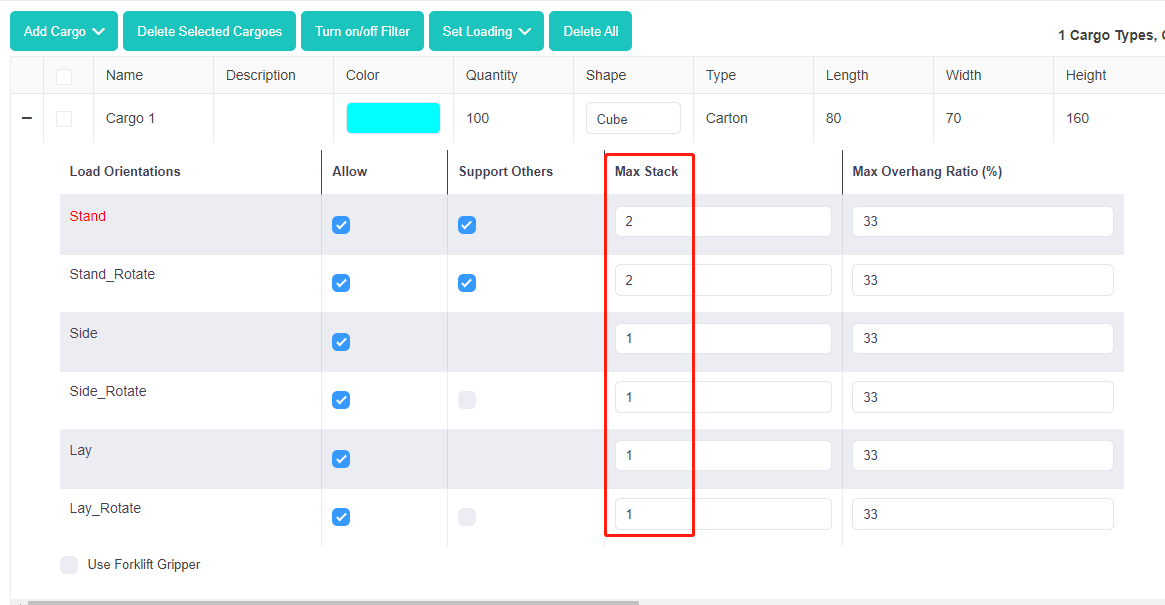 This is Max Stack.
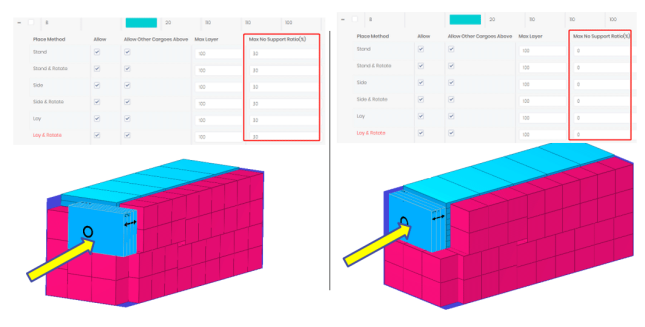 This is the comparison of different overhang rate.
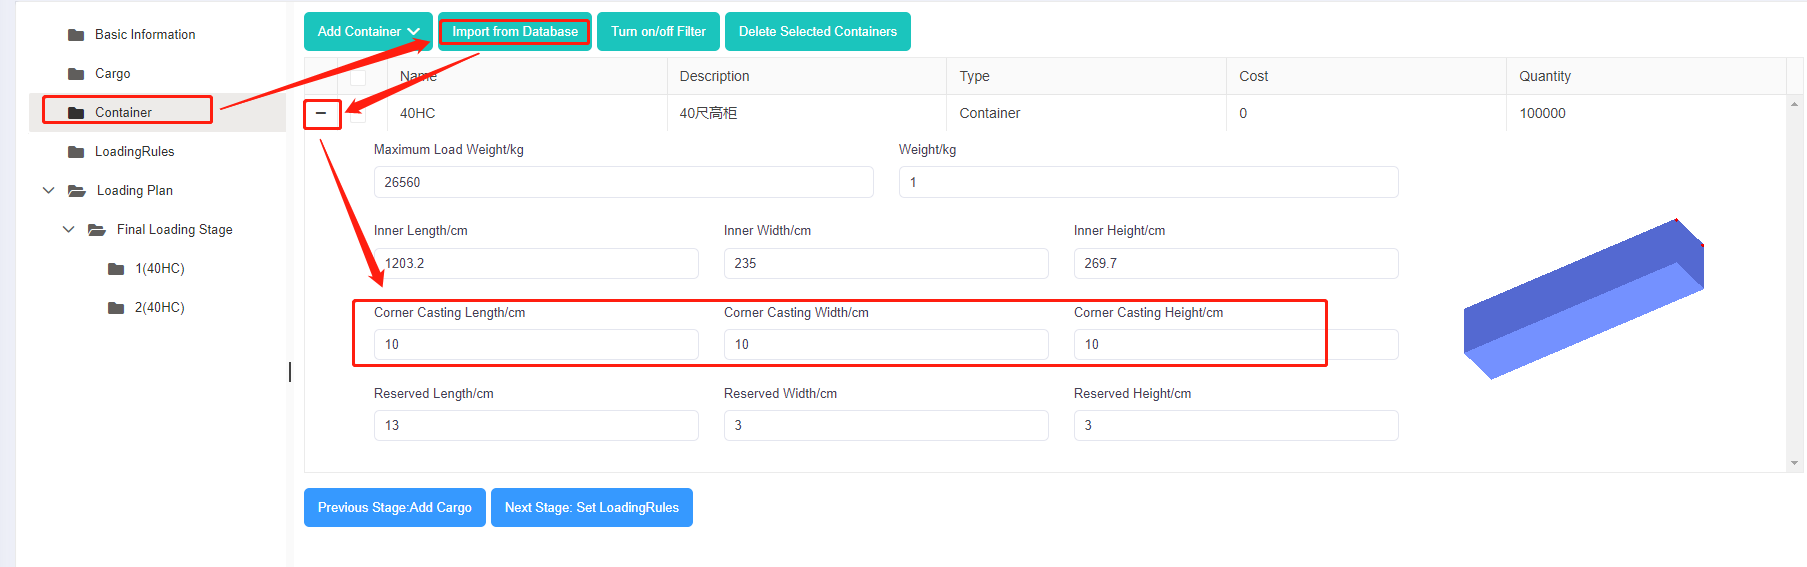 This is how to edit corner castings.
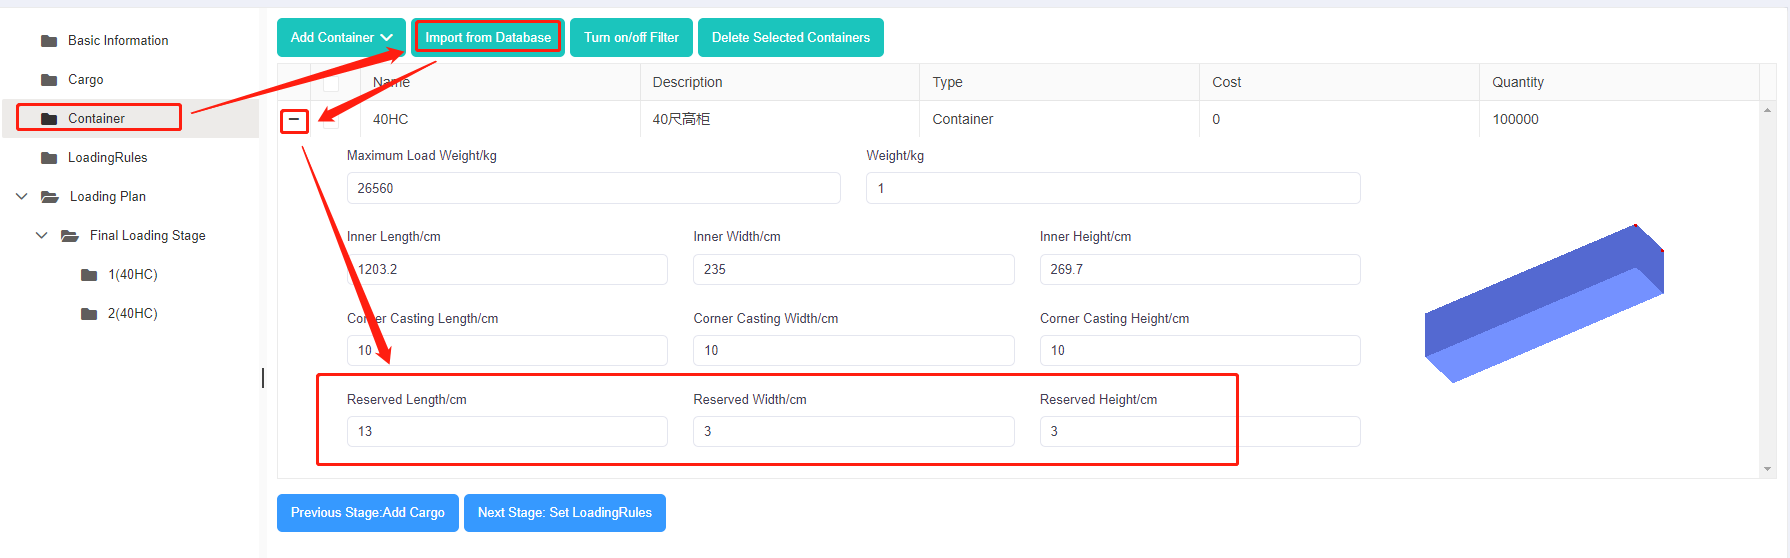 This is how to edit reserved size.
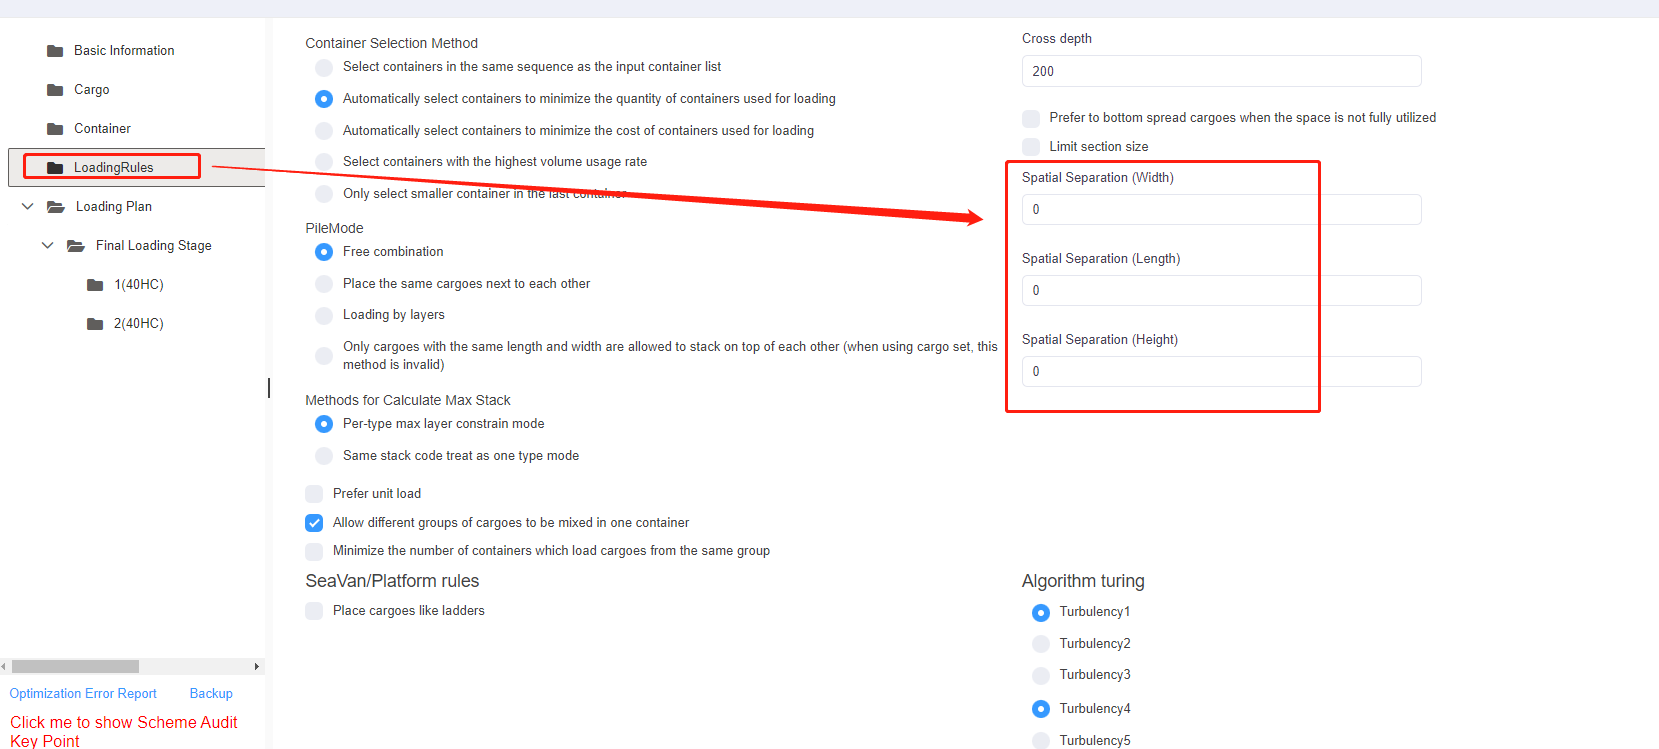 This is how to edit spatial separation.
 This is a man disturbed by complex calculation.
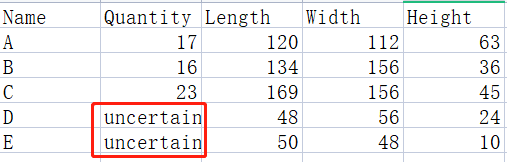 This is cargo data chart.
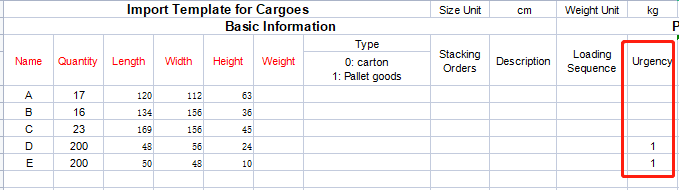 This is cargo dta import template.
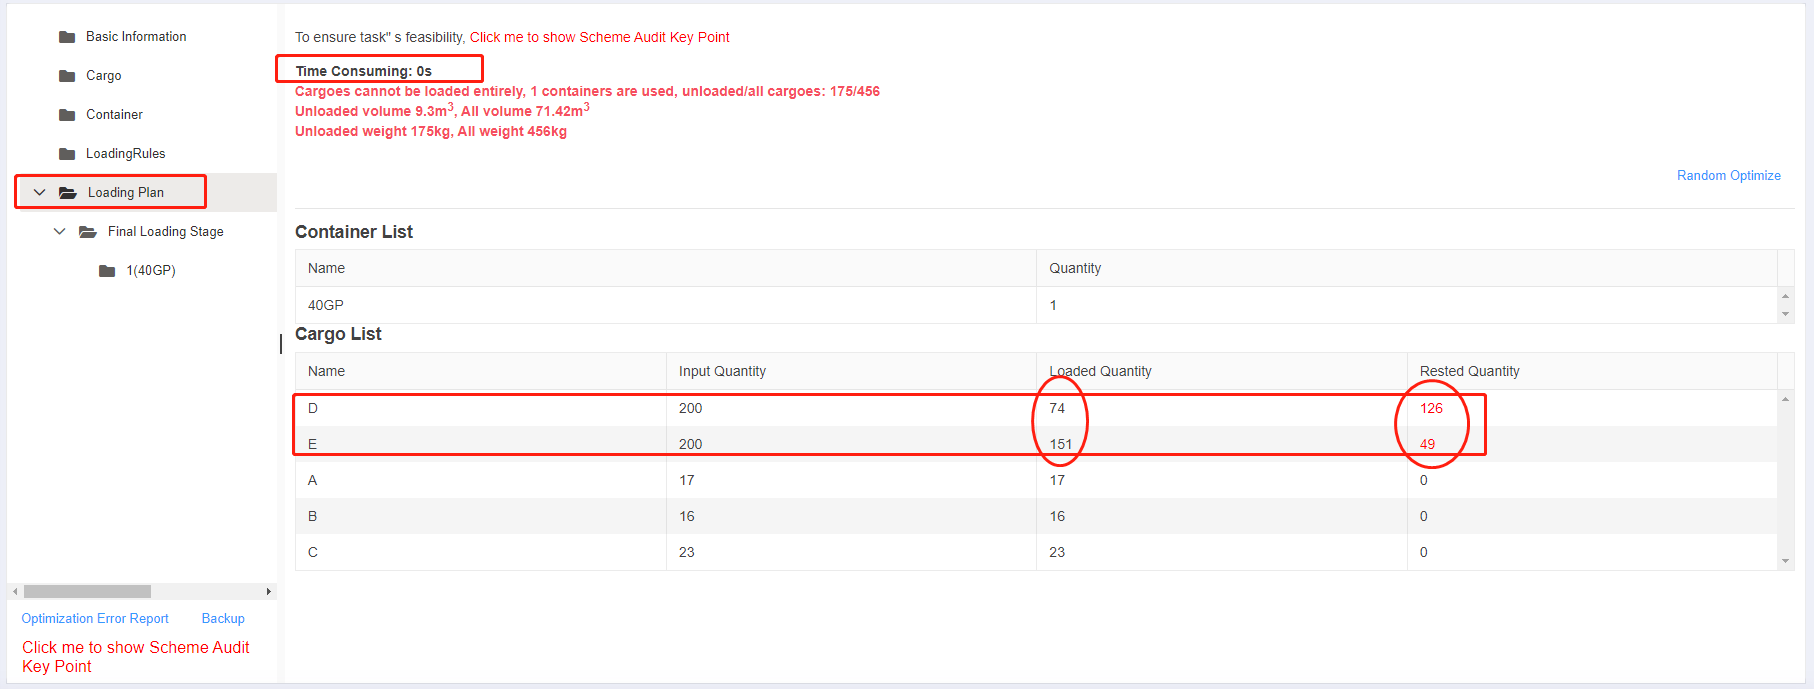 This is the result of loaded and unloaded quantity of unurgent cargo.
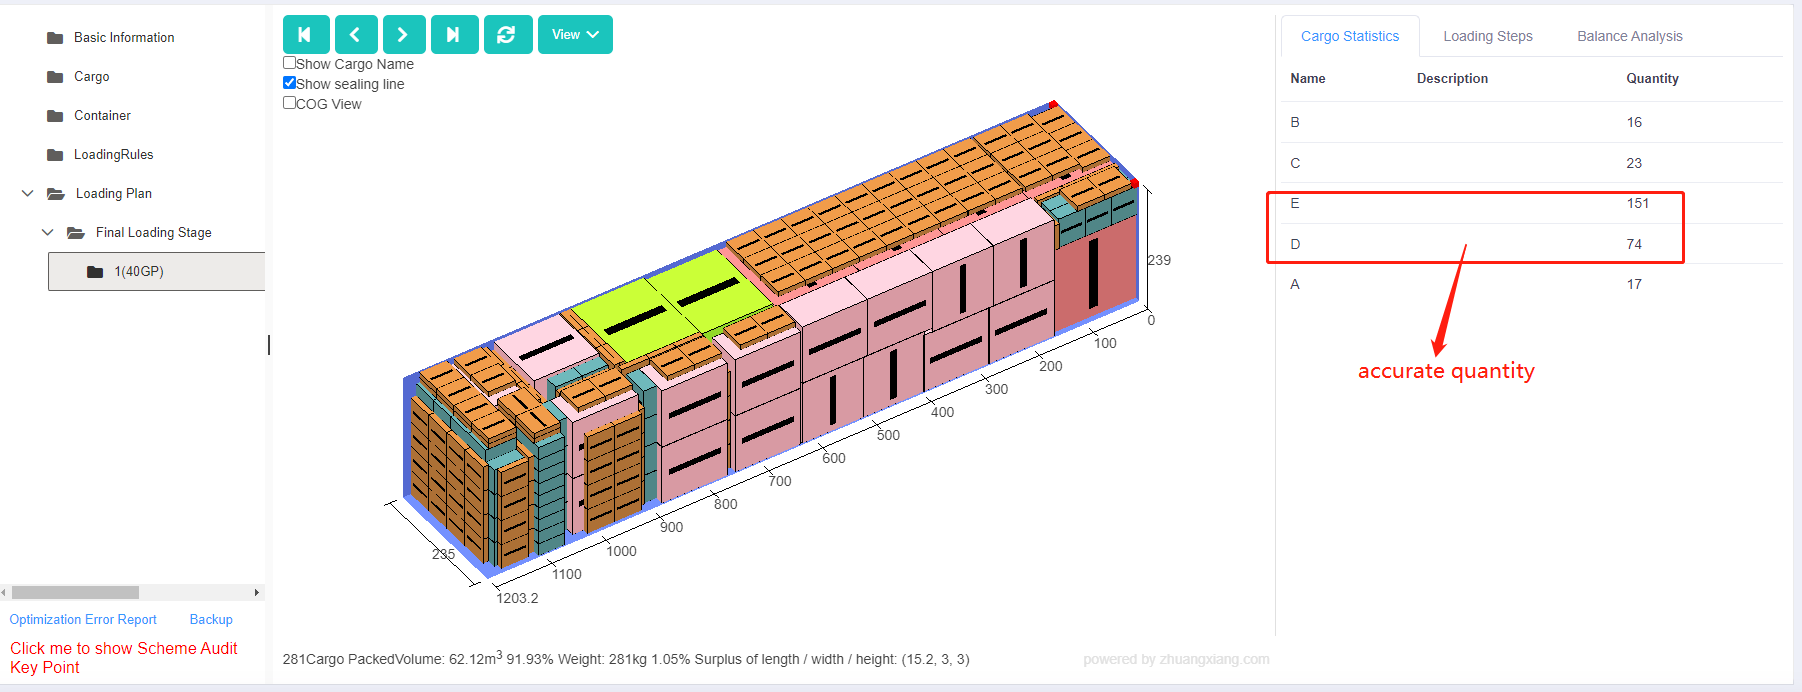 This is cargo statistics with accurate quantity.